Saturday, September 26, 2020

52 CCT September Technique Challenge

It's a fun challenge this week at 52CCT and Rosi's last challenge for September!  She has had some challenging challenges and this is a new one for me.
I have never done partial Stenciling so I was exited to give it a try.  


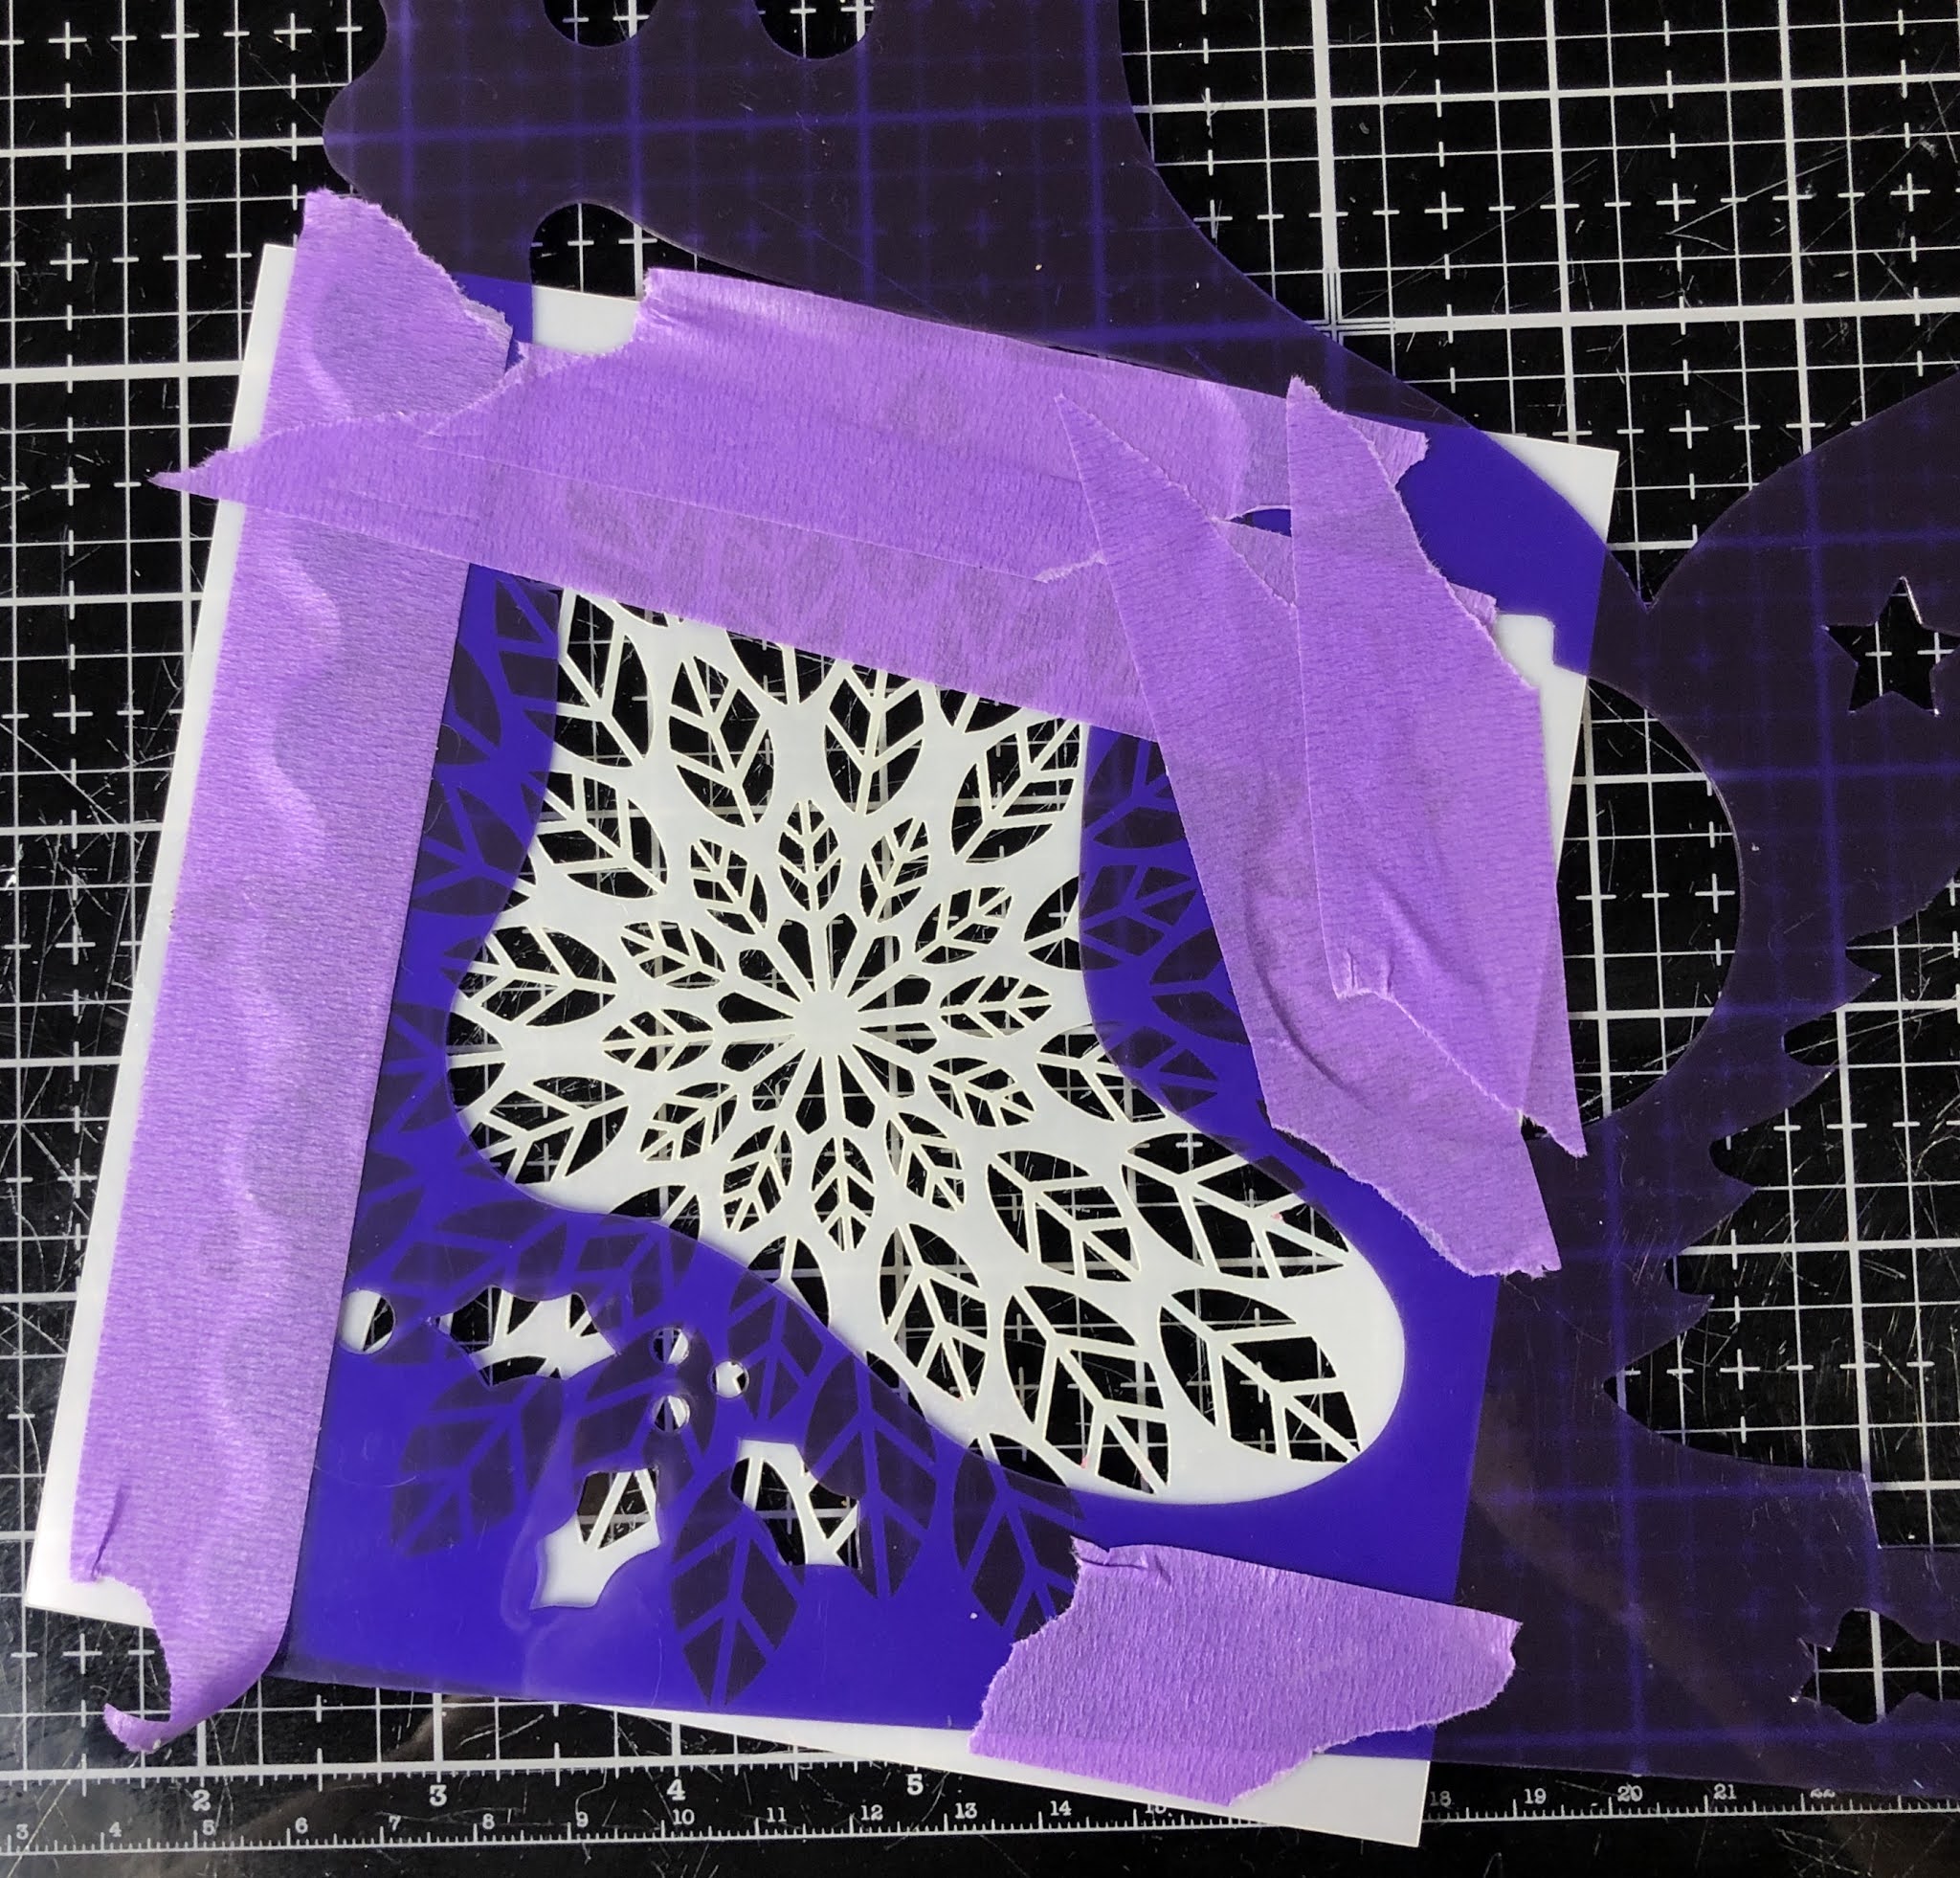
Basically what you do is mask off a stencil and use only part of it.  I used a Stencil within a Stencil on this card.  It was a big stocking stencil and I just taped my design stencil behind it.  I had narrowed my stencils down to 4 and had my husband narrow it down to one.  I think he choose a great stencil.  
If you notice, I taped off the top of the Stocking because I had a different plan for that area.


Next I spread transfer gel all over it.


It took about an hour for the transfer gel to dry.  You will know it is ready when it dries clear.
I had a foil that I thought would be pretty for this design as it had many colors in it.  


I hand cut out the stocking, making sure to get the top area too.  I used the stencil to trace just the top area so I could cut it out and cover in glue. I pressed white flock onto it and then glued the white area onto the top of the stocking. With green cardstock, I hand cut the evergreen leaves and punched out red for berries.


This was a fun challenge so I hope you all give it aa try and then come on over to 52CCT and load up your card!


Thank you for stopping by!

Netta


Ingredients:
Stocking Stencil
Altenew Leaf Burst Stencil
Deco Foil Transfer Gel
Heidi Swapp Rainbow Reactive Foil
Red Cardstock
Stampendous White Flock
Hole Punch
Green Cardstock
Tim Hotz Brick Embossing Folder
Spellbinders Holiday Sentiment "Noel"
Stampin Up Cherry Cobler Ink 


Saturday, September 19, 2020

Rosh Hashanah

(2nd post today) 

Happy New Year!

Last night was the start of the Jewish New Year.  I made the card last night but I didn't want to post it until I gave it to my Father in Law.  One of the customs of Rosh Hashanah involves eating apple slices dipped in honey.  They believed the apples had healing properties and honey signified hope that the new year would be sweet.  When this class "Honey Jar" was released at Kit and Clowder in February 2020, I knew it was perfect for this holiday.


This honey pot image came with the class.  I found a line drawing online  of an apple so I printed out the size I wanted, colored it up, popped it up and added it to the card.


Inside the card it says...
May you be Inscribed, BLESSED, watcher over,
PROTECTED, covered, LOVED, and sealed...
this year and everyone one to come.


On the back of the card, I remembered what he told me long ago...that older folks fingers do not work as well as when they were younger and sometimes opening a card is difficult.  He suggested cards should always be at different lengths between the front and back to make opening easier.  
I remembered!!


Thank you for stopping and if you celebrate this holiday...Happy New Years to you!

Netta

52 CCT September Theme Challenge

I just love this digital image from Connie Fong.  I was so glad I found it for Rosi's challenge today...use a penguin or polar bear or both.
It was simple to make.  Just color, cut and glue!


I did not want a plain background so I used 3 prismacolor pencils to get the night sky.  A pencil blender pen helps to blend the colors together as it goes from lighter to darker.  To do the snowflakes, first I used a prismacolor white pencil and it gave a soft glow of flakes.  The stark white smaller dots are from a Uniball Signo white pen.
After it was all put together, I used stickles to add the silver, red and gold bulbs on the tree...clear on the pom poms....yellow for the star and glow.


Come on over to https://52cct.blogspot.com/  and join us to see what the rest of the Designer Crew did with Rosi's challenge.


Have a great day!
Netta

Ingredients:
Digital image purchased from Connie Fong of Polar Bear and Penguin
Night Sky Prismacolor Pencils #PC133, PC906, PC1103, PC938 and Uniball Signo
Finesse Colored Pencil Blender Pen
Spellbinders Fluted Tracery cutting Die
Stickles gold, silver, red and diamond

Monday, September 14, 2020

Stenciling Christmas


I decided to do some stenciling and as I was going through the stencil drawer, I came across some very old stencils from Hampton Art.  
It was a box of 10 fairly large Christmas stencils which they called "Holiday Screens".  
I used Distress Oxide Mermaid lagoon along the top and went into Tumbled Glass.  I kept brushing the Tumbled Glass lighter and lighter until you barely could see the end of the word Christmas.
I sprayed Heidi Swapp Color Shine all over the cardstock to give it a shine like snow falling.  In the picture it looks like droplets of something but trust me...it does have a nice glistening shine all over it.

I wanted to mat the main piece on black to make it stand out more and I also needed to punch a reindeer out.  Instead of wasting another piece of cardstock, I just punched it out of the middle of the mat.  My main piece was going to cover it anyway and the recipient would never know there was a piece missing. 


The words from Stampendous Christmas Wishes were stamped on the black cardstock with Hero Arts Unicorn Pigment ink, hand cut and popped up.  

I need to remember I have this box of Christmas stencils.  They would make some interesting backgrounds.
Have a great day and get some of those Christmas cards done!

Netta

Sunday, September 13, 2020

Wall of Flowers


Whenever I create a card and send it to someone, the warm feeling I get is so satisfying knowing that the project has completed its journey and served its purpose.

This card went out to a friend who I thought could use a little pick-me-up!


I used a brick stencil and Distress Oxide Weathered Wood to make the background.  I spritz the stencil that had the ink on it lightly with water and flipped it upside down onto another cardstock and got another background.


The Flowers were popped up to give dimension.

I hope it made her smile...at least for a moment.

Netta


Saturday, September 12, 2020

52 CCT September Color Challenge

Black, Orange and Gold
Halloween card? 
NOPE...its the challenge that Rosi gave us at https://52cct.blogspot.com/.  We are allowed to use a white card base but the main color scheme on our Christmas cards must be just black, orange and gold.  
I had an idea of a sunset or sunrise where the sky is orange reflecting onto the snow with the same color.  I tried to mix gold in the snow to show valleys and hills but I think my idea did not come out so great.  I think my ink pad is old.  I will have to get myself another one.  I was able to get my gold on the card by glueing Merry Christmas on top.  

I also used an Orange Stickles glitter on top as well.  

The background stamps was not enough to go across the card so I had to stamp it twice. 
 Before I stamped the second time, I cleaned off the stamp and I masked off the area where the deer are with regular tape.  I just wanted to extend the tree areas.

After inking the card and before stamping it down... make sure you remove the tape!
You can see where I inked the stamp... leaving the section clean where the deer are.
 The beauty of using a Misty makes it easy to repeat the steps again to get a darker black image...clean, tape, ink, remove tape and stamp down.

My husband is my judge on cards.  He will tell me if a card is not the best.  Even though I was feeling not so great on this card...he gave me a thumbs up.
I went with his approval and popped it in with my stash of Christmas cards!

Now follow me over to 52CCT and check out the other Designers.  I can't wait to see what they do with this challenge!

Netta


Wednesday, September 9, 2020

The Outlawz Color Challenge with a Twist

 I have been working the birthday cards really hard this past week and I hit a brain freeze.  No ideas came to mind so I turned to The Outlawz to challenge my brain.  First thing I came to was a Color Challenge with a twist.  The twist was to add one butterfly.  I opened my stamp and die book and my eyes fell on the Die'sire "Lace Butterfly" die.  I used shimmer white cardstock and cut out the die.  I placed the die cut over plain white cardstock to see where the wings and center of the. butterfly was.  I used a sponge and sponged on one color of the Distress Oxide where the wings would be,  another where the body was and one more all around the edges.

The challenge was to use at least 3 of the colors offered.

I took a photo of the colors I used plus I used the dark purple for the card base and matted the words with the dark purple as well.


UPDATE:   I started another one ...same idea and I messed up.   I pulled it back out and was able to fix it.  I actually like it better! 


Off to go post it at the The Outlawz Challenge site and probably take a look around to see what else I can do!

Thank you for stopping...
Netta

Saturday, September 5, 2020

52 CCT September Sketch Challenge

 Welcome to Septembers Sketch!
Can you believe it is September already?  I know, I keep saying that but I can't believe this year is going so fast.
Before I get to the sketch, I wanted to bring your attention to the background.  It was one of my experiments on the last challenge two weeks ago.  I did the Shadow Stamping with a Stencil.  I was able to use up one of the backgrounds on this card.  


Now on to the challenge today.  Sketch Challenge and all the challenges in September will be by Rosi.


One good thing about sketches, they are there to get you inspired and you can flip them anyway you want.  I flipped it sideways.  Turning the sketch helped me to fit the words HO HO HO. 


Also, just because it shows snowflakes, it doesn't mean that is what you have to place there.  It's just the placement of what you use that is important.
Here is what I came up with.


I want to thank you all for stopping by each week!  
Love to see what you can do with this sketch...head over to https://52cct.blogspot.com/ and while you are there...check out the other Designers creation with this sketch.

Happy crafting day!
Netta


Kwan Crafts Word Stamps Set
My Favorite Things Ho Ho Ho Die
Carta Bella Holiday Ornaments Background Stencil  
Left over White and Dark Blue Cardstock
Stampin Up Night of Navy Ink
Hero Arts Unicorn Ink


Tuesday, September 1, 2020

Guitar Man

Here is another card I made some time ago.

My grandson is in a band with other classmates and is very much into music these days.

I found the perfect image from Crafts-U-Print called "Hot Birthday"

It was easy to make...print images out on cardstock, cut out all the pieces and  pop up or glue down. No coloring on this one as it was done for me.  After putting it together, I threw some glitter on it to give it some birthday sparkle.  While working on this card, the sneakers reminded me of memories of when I was a child.  There was a factory my mom worked at which was only a 5 minute walk from the house. They use to make these high top sneakers all the time.  The big rage back then. I remember as a kid climbing around on their throw aways or scraps out back until the big trucks came and hauled them away.  I use to collect all kinds of material and fur for crafts.  Even back then when I was around 10, I was still into crafts.  

 I see lately that kids are back to wearing them.  Perfect card for a teenage young man.