
Sweet adorable Gingerbread Man baking away at more gingerbread cookies!
Reminds me of the story...Run! Run! As fast as you can't catch me. I am the Gingerbread Man!
Colored with pencils and Copics. Submitted to Christmas Kickstart Challenge.
.jpg)

Sweet adorable Gingerbread Man baking away at more gingerbread cookies!
Reminds me of the story...Run! Run! As fast as you can't catch me. I am the Gingerbread Man!
Colored with pencils and Copics. Submitted to Christmas Kickstart Challenge.
I was so excited to be invited as a guest designer this week over at 52 CCT. Its a Theme challenge this week and the theme is Pets!
What to choose from? I have dogs in many poses. I have cats. I have lambs. I have so many to choose from! I ended up with this stamp set "Santa Paws" from Art Impressions. I have used many stamps in this set but today I am working with the group of singing dogs.

I stamped the image first and masked it so I could do the sky which is Distress Oxides Prize Ribbon, Dusty Concord and Tumbled Glass. Those colors are my go-to when I make a night sky. The stars are splattered Dr Ph Martins Pen White Ink. it comes with a dropper. I just dipped a brush into it and splattered the ink. It works the best for me for stars. Next I colored with my Prismacolor Premier colored pencils. I love that sentiment that was stamped on vellum and clear embossed with Altenew Crystal Clear embossing powder. I picked the sentiment up from Rubberstamps.com called Christmas Cheer.
I hope you join us over at the 52 Christmas Card Throwdown. Just click the link and it will take you over to the Theme Challenge-Pets. We all would love to see what you make too!


I love this forest and deer stamp and have used it quite a bit. I have had it for years. I love that it can be used for any time of year as it has nothing to do with winter ...unless you add snow! It would be a perfect masculine card as well.
I had an image in mind, on what my card should look like but it took me 3 tries! My first time I didn't like the colors. It looked like mud as I blended. Second time I realized I should have stamped the image last as the distress ink made it look like more muted grayish instead of a nice black as I blended. Three times is the charm they say!
After I was happy with the ink blending for the land, water and sky, I used the sun and ray stencil with the same Squeezed Lemonade and blended it so it went up into the sky.

After I did the rays I lightly went back over with the pink and blue in the sky again to blend the rays in a little. On the actual card, the rays are more faint than in the photograph. I made sure to stamp the image 4 times. Two times first and then I moved the image over to the left edge to fill in the rest of the land and trees. I stamped 2 more times for the edge. I wanted that dark crisp black. Next, came the snow falling and that was white paint splatted with an old toothbrush I keep in my art supplies. A little trick I learned from back in the day when I learned how to oil paint. I believe I was around 11 or 12 at the time. I also used THE BEST EVER white gel pen to make snow...Arteza White Gel Pen. I have used this type a lot over the years and this brand never fails me!
Can you believe half the year is not even here yet and I almost have all my Christmas cards done! This is the very first time I am not scrambling in November.
Where are you at? Have you even started yet?
*smile*
Submitted To Challenge

Supplies
Today is the first day of summer and I have Christmas on my mind. Elizabeth, at 52CCT has chosen Candy Canes as the theme this month. I had not pulled out pencils for some time so I decided to color up an image that was full of candy canes. With a fine tip marker, it was easy to get all the green and red sprinkles all over the candies.


The sentiment was printed from my computer and I thought it fit in with the theme of candy canes!
Front: Have you been good this year?
Inside: If the answer is Yes...then you've earned your stripes this Christmas!

Submitted to Challenge
https://52cct.blogspot.com/2023/06/june-theme-challenge.html
Supplies
I have a hate-love with the Karen Burniston Parcel Pop-up card!
I find it confusing building it but I love the look of the card when done though!
It's just fun when you open it and see a package. Pull the bottom down that has the red arrow and up pops the surprise!


Submitted to challenge
I saw this stamp and loved it. Had to have it, however it was difficult for me to color with copic markers. I think next time I will try pencils.

All in all, I think it was perfect for this sketch!

Submitted to Challenge
https://52cct.blogspot.com/2023/06/june-sketch-challenge.html
****Update****

Supplies:
Use it up is the theme this week. Those who know me well...knows full well how much stuff is in my craftroom that could be used up!
*please click on the photos to see each photo better*

First thing I thought of was Jennifer Mcguire's video I watched a few weeks ago. Use up that glitter was her theme. You can see it here on how she made her card...
https://www.jennifermcguireink.com/2023/05/use-up-your-glitter.html.
It was very easy to follow and not that much of a mess. The hardest part for me was to find a background die! Cut out the die and place it down onto a piece of cardstock that had an adhesive sheet on it. Smash glitter into all the areas that was still open. That was it!
I had a piece of blue metallic cardstock left over from a project and white glitter from years ago that I used. I also found a package of Stampin Up Multipurpose Adhesive Sheets NEVER OPENED from several years ago too! The white card base was also from my stash. I had measured and put my fold on the wrong spot so I just stuck it in my pile to use up someday. I made that work as my base. It was very short on one side and I had enough of the blue metallic cardstock, so I placed a strip along the wider edge.
This card is so pretty. Here is a close up so you can see the sparkle from all that glitter. It looks like I used a glitter background but this way I am using up some of that glitter I have been hoarding for so long.


Submitted Christmas Card to Challenge
https://52cct.blogspot.com/2023/05/may-stash-challenge.html

When I saw this theme, I knew exactly what I was going to do. Lucky I had the pieces to put it together!
It looks like the Carolers are singing to "someone" at the front door.


Inside:
"The Best Way to spread Christmas Cheer
Is singing loud for all to hear"
Submitted to Challenge:
https://52cct.blogspot.com/2023/05/may-theme-challenge.html


I love purples and blues on a Christmas card because I think they give off the sense of cold. In my neck of the woods, we do have cold during that time and I love it!

No stamping on this card. Just die cutting.
I die cut 3 sets of trees and used Distress Oxide with a blending brush to get a two-tone color the trees. I also used the same colors to do the background of the base.
First layer, which was the tallest trees in the back, was glued down, Next layer, was popped up with skinny pop dots. Last layer had a thicker pop dots. It gives each set of trees dimension.
I wanted the very front (deer and Merry Christmas) to be the deeper purple but the Merry Christmas blended in too much. I had a deeper purple Glitter so I used that and wrote over the top of it.

I tried to make Bokeh circles like the photo below by using water, the eraser part of a pencil and a dropper to get smaller dots on the base background.
Submitted to Challenge
https://christmaskickstartchallenge.blogspot.com/2023/05/challenge-74-colour-palette-fun.html

.jpg)
Supplies
Neenah Classic Crest Solar White Cardstock for Base
Scrap Deep Purple Cardstock
Distress Oxide Ink: Habanero, Dusty Concord, Seedless Preserves,Shaded Lilac, Tumbled Glass
Brown, Green, Red
That was a hard color combo to come up with for Christmas card and the only thing that stuck in my mind was this wreath, so I went for it.
I used white cardstock and cut two wreaths. Before I glued them together, I randomly colored the twigs with the copic markers to give them a two tone look.
I glued everything down and punched a bunch of red circles from scrap red glitter paper for the berries. After everything was glued down, I added glitter red dots.
I think I covered the color challenge well.....brown twig wreath, red ribbon and holly berries with green evergreen leaves.

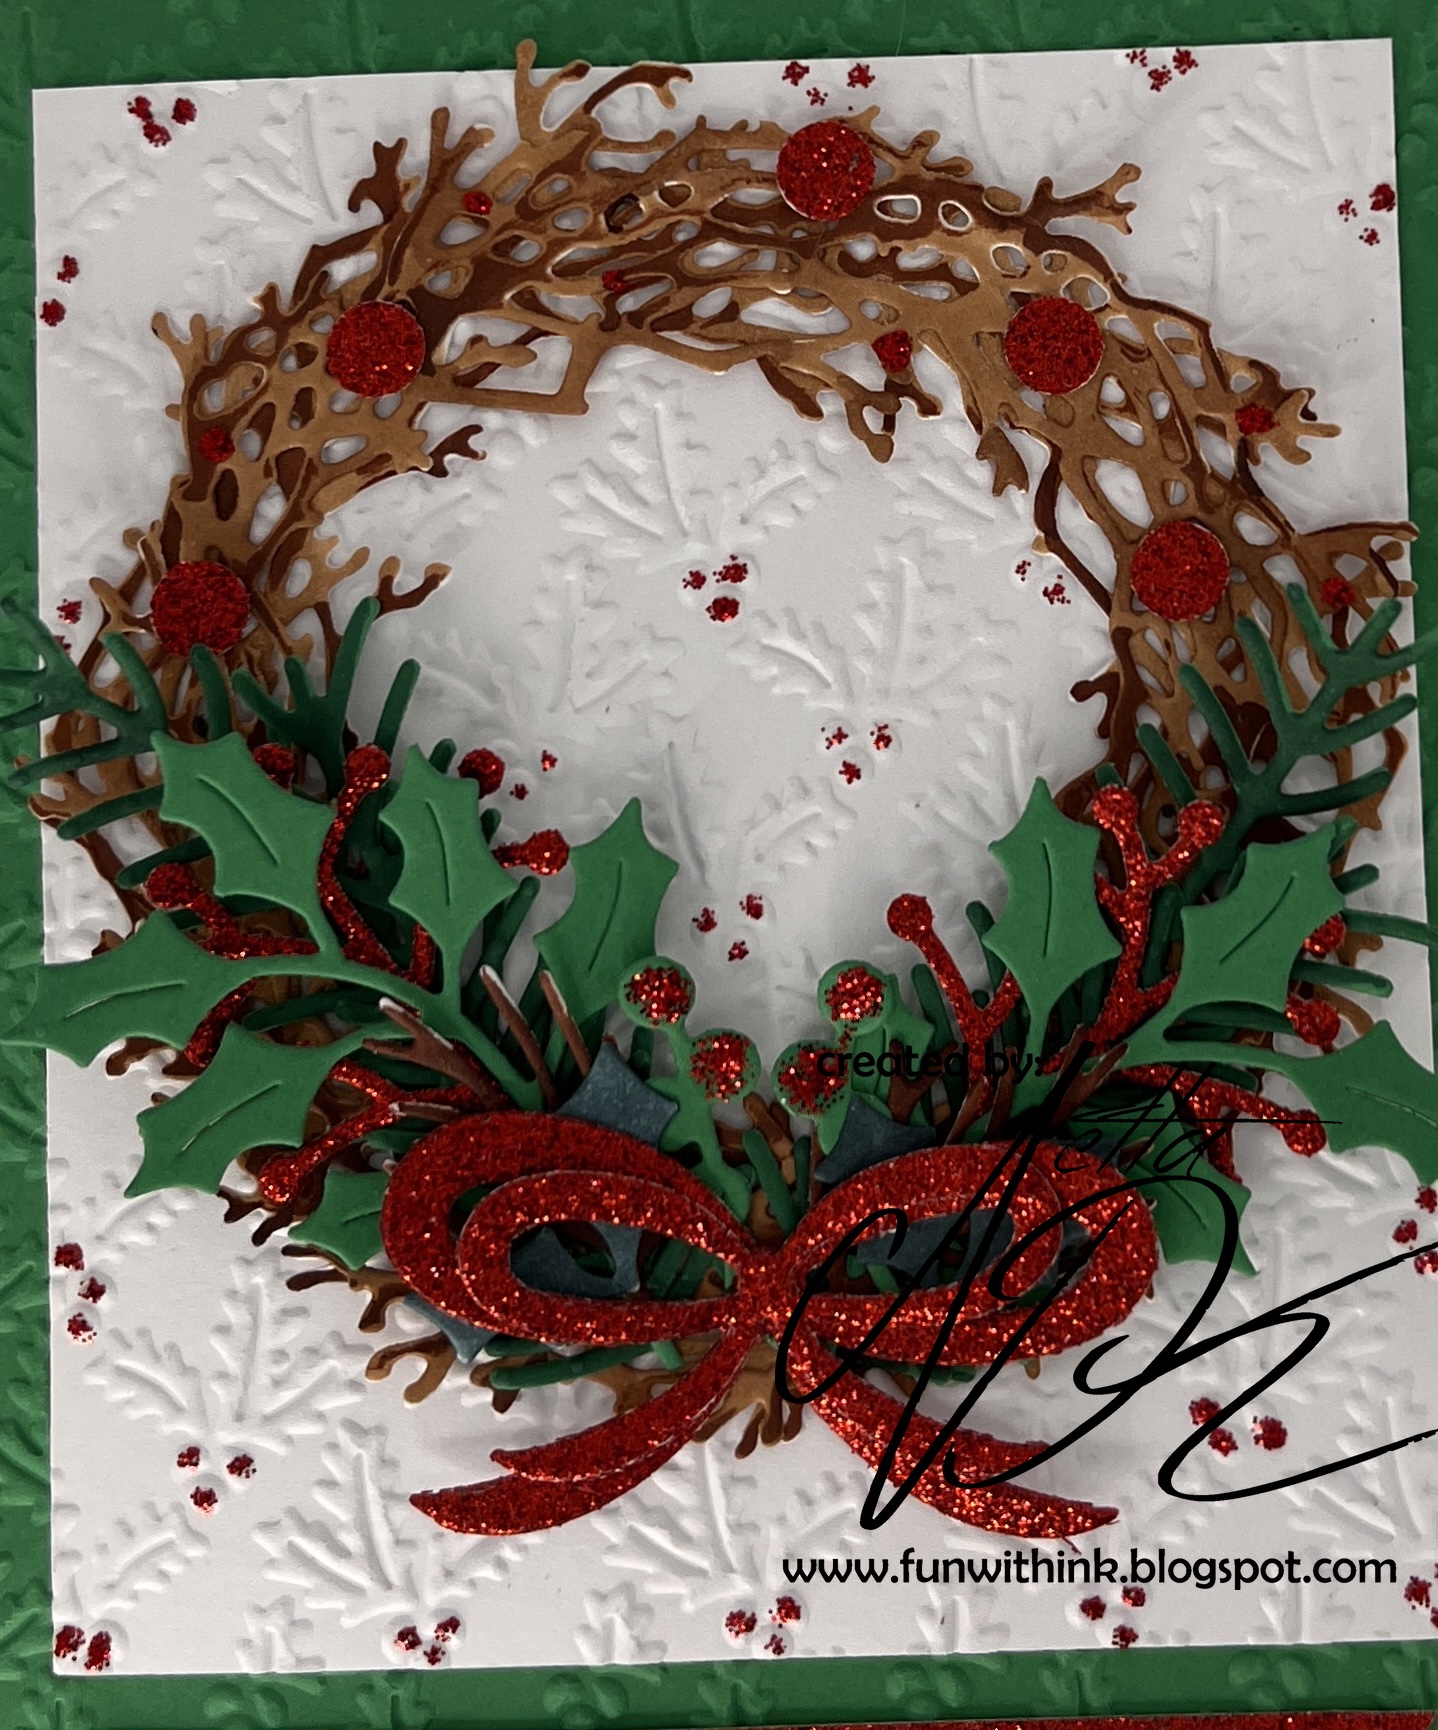
Some day I will get good at taking photos because it really is pretty.
Submitted to Challenge
https://52cct.blogspot.com/2023/05/may-colour-challenge.html

****Update****

Supplies
Neenah Classic Crest Solar White Cardstock for Base
Scraps Green, Brown and Glitter red Cardstock
Impression Obsession Twig Wreath Dig Set
Embosselicious Evergreen Embossing Folder for Background
Ribbons from Stampin Up Pretty Pines Die Set
Evergreens from Penny Black Holly Flourish Die Set
Merry Christmas Die from Spellbinders 3D Poinsettia Surprise Envelope Die Set
Stickles Christmas Red
Copic Marker for the Wreath E57 & E29
Regular hole puncher
Part One
The current letter is C for Cats for the Alphabet Challenge Blog
I did not have a cat image and I need more Christmas Cards to add to my stash so I was lucky to find the perfect digital image Kitten in Christmas Present to purchase.

I used Nuvo Crystal drops Ivory Seashell for the snow. Nuvo Glitter drops White Blizzard on the ribbon and Christmas bulb for the glitter.
Seasons Greetings came from Christmas Blessings Set.
Submitted to Challenge

Part Two
Letter A (playing catch up)
I wanted to start at the beginning of the alphabet challenge and continue playing along to keep caught up. Lucky I was only one alphabet off and that was the letter "A". I think this card would have been acceptable! I made this for my grandson's 3rd birthday. Just a bunch of handcutting with sissors, white pen and circle punches! For his nose, I used a flower ball tool to round it out and used a lot of glue underneath to keep it somewhat rounded in the mail.

I got another Christmas Card done towards my goal for 2023.
I didn't count how many cards I threw away working on my idea! Nothing lined up right.
My idea was to make an image on the inside of a vellum card and to heat emboss a stamp image on the outside of the vellum. The inside was colored and the outside was just the image embossed in white.


Supplies
Stampin Up Vellum Cardstock
White Cardstock
Nuvo Embossing Paper Glacier White Powder
Heat Gun
VersaMark Ink Pad
Altenew Crispe Dye Ink-Sea Breeze and Tide Blue
Colorado & Craft Company-Slimline Poinsettias
Blue Sequins
Dr. Ph. Martin's Pen-White Ink
Blending Brushes
This card took a bit longer to create than I thought it would. No stamping on this card. It is all die cut. It has the card base and 5 snow globe layers (2 layers cut with red and 3 with white) I used one of the white layers to fussy cut out the fur and beard for Santa.
This die set can be made as stand up 3D 6 x6 card but I wanted an A2 card because they are easier to mail. I just cut each layer and stack them on top of each other. Between the 2 top layers and the 2 bottom layers, I added pop dots to raise the words in the top section a bit higher off the Santa. The Santa layer and very top layer was cut from red metallic cardstock and the other two from white.


Submitted to Challenge

Supplies
White Cardstock
Renewing MInds Red Metallic Paper
Spellbinders Shapeabilities Grand Snow Blobe Etched Die Set
Spellbinders Santa Clause Layering Set
IO Poinsettia Small Set

