Saturday, November 28, 2020

52 CCT November Stash Challenge

This is the last Christmas card challenge for November.  One more in December and then I will be concentrating getting all out in the mail.

It's Gill's month to announce the challenges and although the badge states Gilding Flakes, we are allowed to use foil as well.  I had fun working with my Minc machine until I broke it.  I have had it only a couple of years so I was disappointed.  I was foiling a lot of images today for Christmas and birthday.  Towards the end..as I was feeding another image through...everything got stuck.  I ended up yanking everything out but ruined it by doing so.  Needless to say I have another laminator ordered today.  


Here are the ingredients for my card.  One of the tools below is a Spellbinders Quick Trimmer.  I bought only the replacement blades.  You get two in the package. One is for foil and the other is for paper.  I LOVE the blade for foil.  It cuts perfectly through foil and much faster than grabbing a pair of scissors. 


Here are a few closeups of the snowflake...some with flash and some without.  The words behind the snowflake are also foiled but the background stamp is an unknown company.   On the snowflake I used two sided tape and used the snowflake die to cut out the image.  I took a piece of foil and kept pressing it against the snowflake until it was covered.  Keep in mind, you cannot use the foil for hot foiling.  The camera does not do it justice.  It really came out pretty.


I had a lot of fun creating this card.  If you have some gilding flakes or foil, come play with us!


Happy card making!
Netta

Saturday, November 21, 2020

52 CCT November Theme Challenge

 Winter Wonderland...what a great theme.
Kraft cardstock, white paper, white craft ink, dark brown ink, rubber stamps is all you need!
I added white pen snowflakes and a few sparkling ones.
I cut an oval out of a scrap cardstock and placed it over the cardstock.  I used the white craft ink and sponged it all over.  Next I used my Misti to re-stamp the image with brown 3 times.
I wanted to add flowers and such around it but decided to go with plain.  I think it is very elegant this way.  
Stamp the words "Have Yourself" on the front and inside "A Very Merry Christmas" inside.
How is the card making going?  If your looking for inspiration...join us at 52CCT!  We would love to see what your idea of Winter Wonderland would look like.


Netta

Saturday, November 14, 2020

52 CCT November Color Challenge

Now we are talking!  Real Christmas colors...Red and Green!  You have to admit...there sure has been some different color changes this year!  They made me really stretch my imagination but that is point right?  Work outside the box and be challenged. 
 I bought this digital image from Jan's Digi Stamps a couple of weeks ago and it is called Holiday Candy Deluxe.   When I began to work on ideas, this image came to mind.  I had a bit of a problem trying to make it look good on my regular A2 cards and decided why not?  I might as well jump on the band wagon and try out a Slimline card.


It took only a few pencils to color this image.  It actually went pretty quick.


I wanted a little sparkle on the Christmas candy and was very unhappy with my red sparkling glue.  I think it is time to buy another.  It was coming out in clumps. 


Hope you head over to 52CCT and give this challenge a try.  
You do realize time is short to get your Christmas cards done right?


 Happy crafting everyone!
Netta

Saturday, November 7, 2020

52 CCT November Sketch Challenge

It's the first weekend in November.  I cannot believe it.  It's November and time for Sketch Challenge at 52CCT.

The Santa image I used was given to me by my mom many years ago.  She passed several years ago but I am guessing she bought it about 18 years ago.  It was removed off the block so I have no idea what company it came from.  I have had to repair the back of it twice as it was falling apart.  I actually was surprised it still stamped well enough.


I colored Santa with Copic markers R29, R35, G05, G28, B02, BV000, E00, E13.
I used a Gold Marker for the belt.
The toy bag was hand cut to cover the original bag sitting by Santa.  I wanted it to replace the square in the sketch and to have a sentiment stamped on it.  The original stamped bag was actually checkered and a sentiment did not show up well. 


I used Liquid Pearl for fur and hair.  The snow on the ground was torn paper with a line of  Diamond stickles along the edge.  Did you know that it makes a difference when you tear paper to make hills or snow mounds?  Take a scrap of a paper, grab both sides at the top and rip down with your hand pulling toward you.  Now do the opposite and rip away from you.  The edge is different.  I always use "rip towards me".


The Red long strip towards the back is the lamppost, the green is Santa and the bag is the titled red square in the front.  Remember...a sketch is just to show you where the placement of your images or paper will go. It's just to get you started with an idea!


I counted up my cards and I am in the 70's.  I made my goal and then some with plenty of time to spare!  I do know by the time I am done, I will be around 100.  The last several will be pretty much done in assembly line as the structure is the same but colors may be different.  I just put on Christmas movies and start cutting and glueing!  Got to save something for the Christmas Season!

Thank you for stopping by.  Feel free to leave any comment or question for me.  Maybe I will see you over at 52CCT!

Hugs,
Netta

Saturday, October 24, 2020

52 CCT October Technique Challenge

I am late posting this.  It should have gone live earlier today however yesterday I got home from work not feeling well.  I got most of the card done and could not finish.

This week at 52CCT ..it is all about fancy folds!  I was so happy to see the entire Design Team all created a different Fancy Fold!  
I used the Screen Divider Fold.  

I wish the punches had the name of the punch on them but they do not.  It has the company name Martha Stewart so I did a search and cannot find the name of the lever punch.  If anyone knows, please let me know!  I think I am going to start writing the name on the punches!  For the Legs of the fold, I used the Stampin' Up Paper Punch Decorative Label Shape #120907.  It has since retired.  

If you would like to give this a go, check out this post for directions...

Very easy to do and many ways to decorate.  I did a couple in the past...

 If you do not have the same label punch, I think something in your stash would work for the punch!

Do you have something different than what the Design Team used?  You actually have extra time to get it done as we are skipping next weekend.  It will be due by November 6th.
 Love to see it!  Come join us...

 Netta

Saturday, October 17, 2020

Boss's Day Card

(2nd Post today)

Yesterday, we took our boss Ralph and his wife Ellen, out to breakfast for boss's day.  

I made this card for him from a Craftsuprint.com kit.  If you want to check it out, search  #cup747177_2049.

It was a lot of cutting and gluing but I liked the results. I did not use everything they give you.  I think what I did use was more than enough!  

Some of the pieces were raised up higher by glueing them onto a strip of clear hard plastic. 


A few weeks ago, I had saved a blue mesh that my cantaloupe came in as it reminded me of fishing netting.  I remembered I had it so I added it on the card.

  I glued some to the back and stuffed it between the pieces.  


It folds pretty flat for mailing...just a little bit of bulk to it.


My message to him went on the back and I placed it in the envelope so he would see that first.


I love that the set comes with an envelope you can put together as it is not an A2 size.


Lots of cutting but it went together easy.

Netta

52 CCT October Theme Challenge

Many love when the colder weather sets in because they get to wear their sweaters with leggings and boots.   In Florida, we do not get as cold as some areas but it is the same here.  As soon as the temp drops, the sweaters come out and in some cases the leggings and boots as well.

Rudi feels the same!  She dug out her sweater..all fluffy white with gold designs throughout it.  It's perfect for the Christmas Holiday!


At 52CCT, it is Theme Challenge this week and the challenge is to use Winter Sweaters.  Come join us there!


Netta

Saturday, October 10, 2020

52 CCT October Color Challenge

I am here again with another 52CCT challenge.  Come join us for this months color combination.

It features Kraft, White and Blue.  Don't forget you can use black but the 3 colors of the challenge has to be the dominate colors.

Here is my inspiration for you but do not forget to head to 52CCT and get more inspiration from the rest of the Design Team!


You have until Friday, October16th to upload your creations!


 Hugs,
Netta

Ingredients:
Paper Studio Kraft cardstock
Blue Foil Cardstock
White Cardstock
Memento Danube Blue ink
Impressions Obsession Poinsettia Die Set

Friday, October 9, 2020

Fall Anniversary and Birthday Cards

 I had a lot of fun making these three cards.  Fall is my favorite season.  I miss seeing all the color of the leaves since I live in Florida so I really enjoyed making these.  


These were already popped into the mail so hopefully they will be enjoyed soon!

Netta

Thursday, October 8, 2020

Birthday Cards

 Just a quick post as I wanted to share a couple of Birthday cards I made recently.

This card had a mask along the edge so when I stamped, it would leave a white edge. I was so happy to find in my stash, some green string, ink and background paper that all matched.  The leaves were inked with a bit darker ink to stand out more.


The flower background, on the card below, was cut out twice and glued together to stand out more.  I saved the flower pieces to stuff back into the flowers with just one layer so it was down into the flower.  A little bit more work but I liked the look.


I have a few more to add but will leave that for another day!

Netta

Sunday, October 4, 2020

Card Making Day 2020

 Last night I wanted to post my cards I made for Card Making Day but I had lost my mojo and went to bed early!

I got a couple of birthday cards done and Christmas cards.

I think it was a great day yesterday!


With the Christmas Cards, I used some embossing paste and stencils from Altenew to create backgrounds.  I got these done and while they were drying I worked on the birthday cards posted above.  The pine cones background was actually used two stencils.  I have one more background but I am saving that one for a Christmas card I will do later.


Enjoyed my day so much I may continue today!

Hope you had a great crafty Card Making day as well

Netta

Saturday, October 3, 2020

52 CCT October Sketch Challenge

Good morning and welcome to another challenge at 52CCT.  This month, it will be Majda who will challenge us each week and as always..we start the challenges for the month with a Sketch.
Also, today is a very big day! 
 It is the 1st Saturday of October which means it is Card Making Day!  
Love this day!!
Look for at least one more post for me today that will show (hopefully) a lot of cards that I will make.

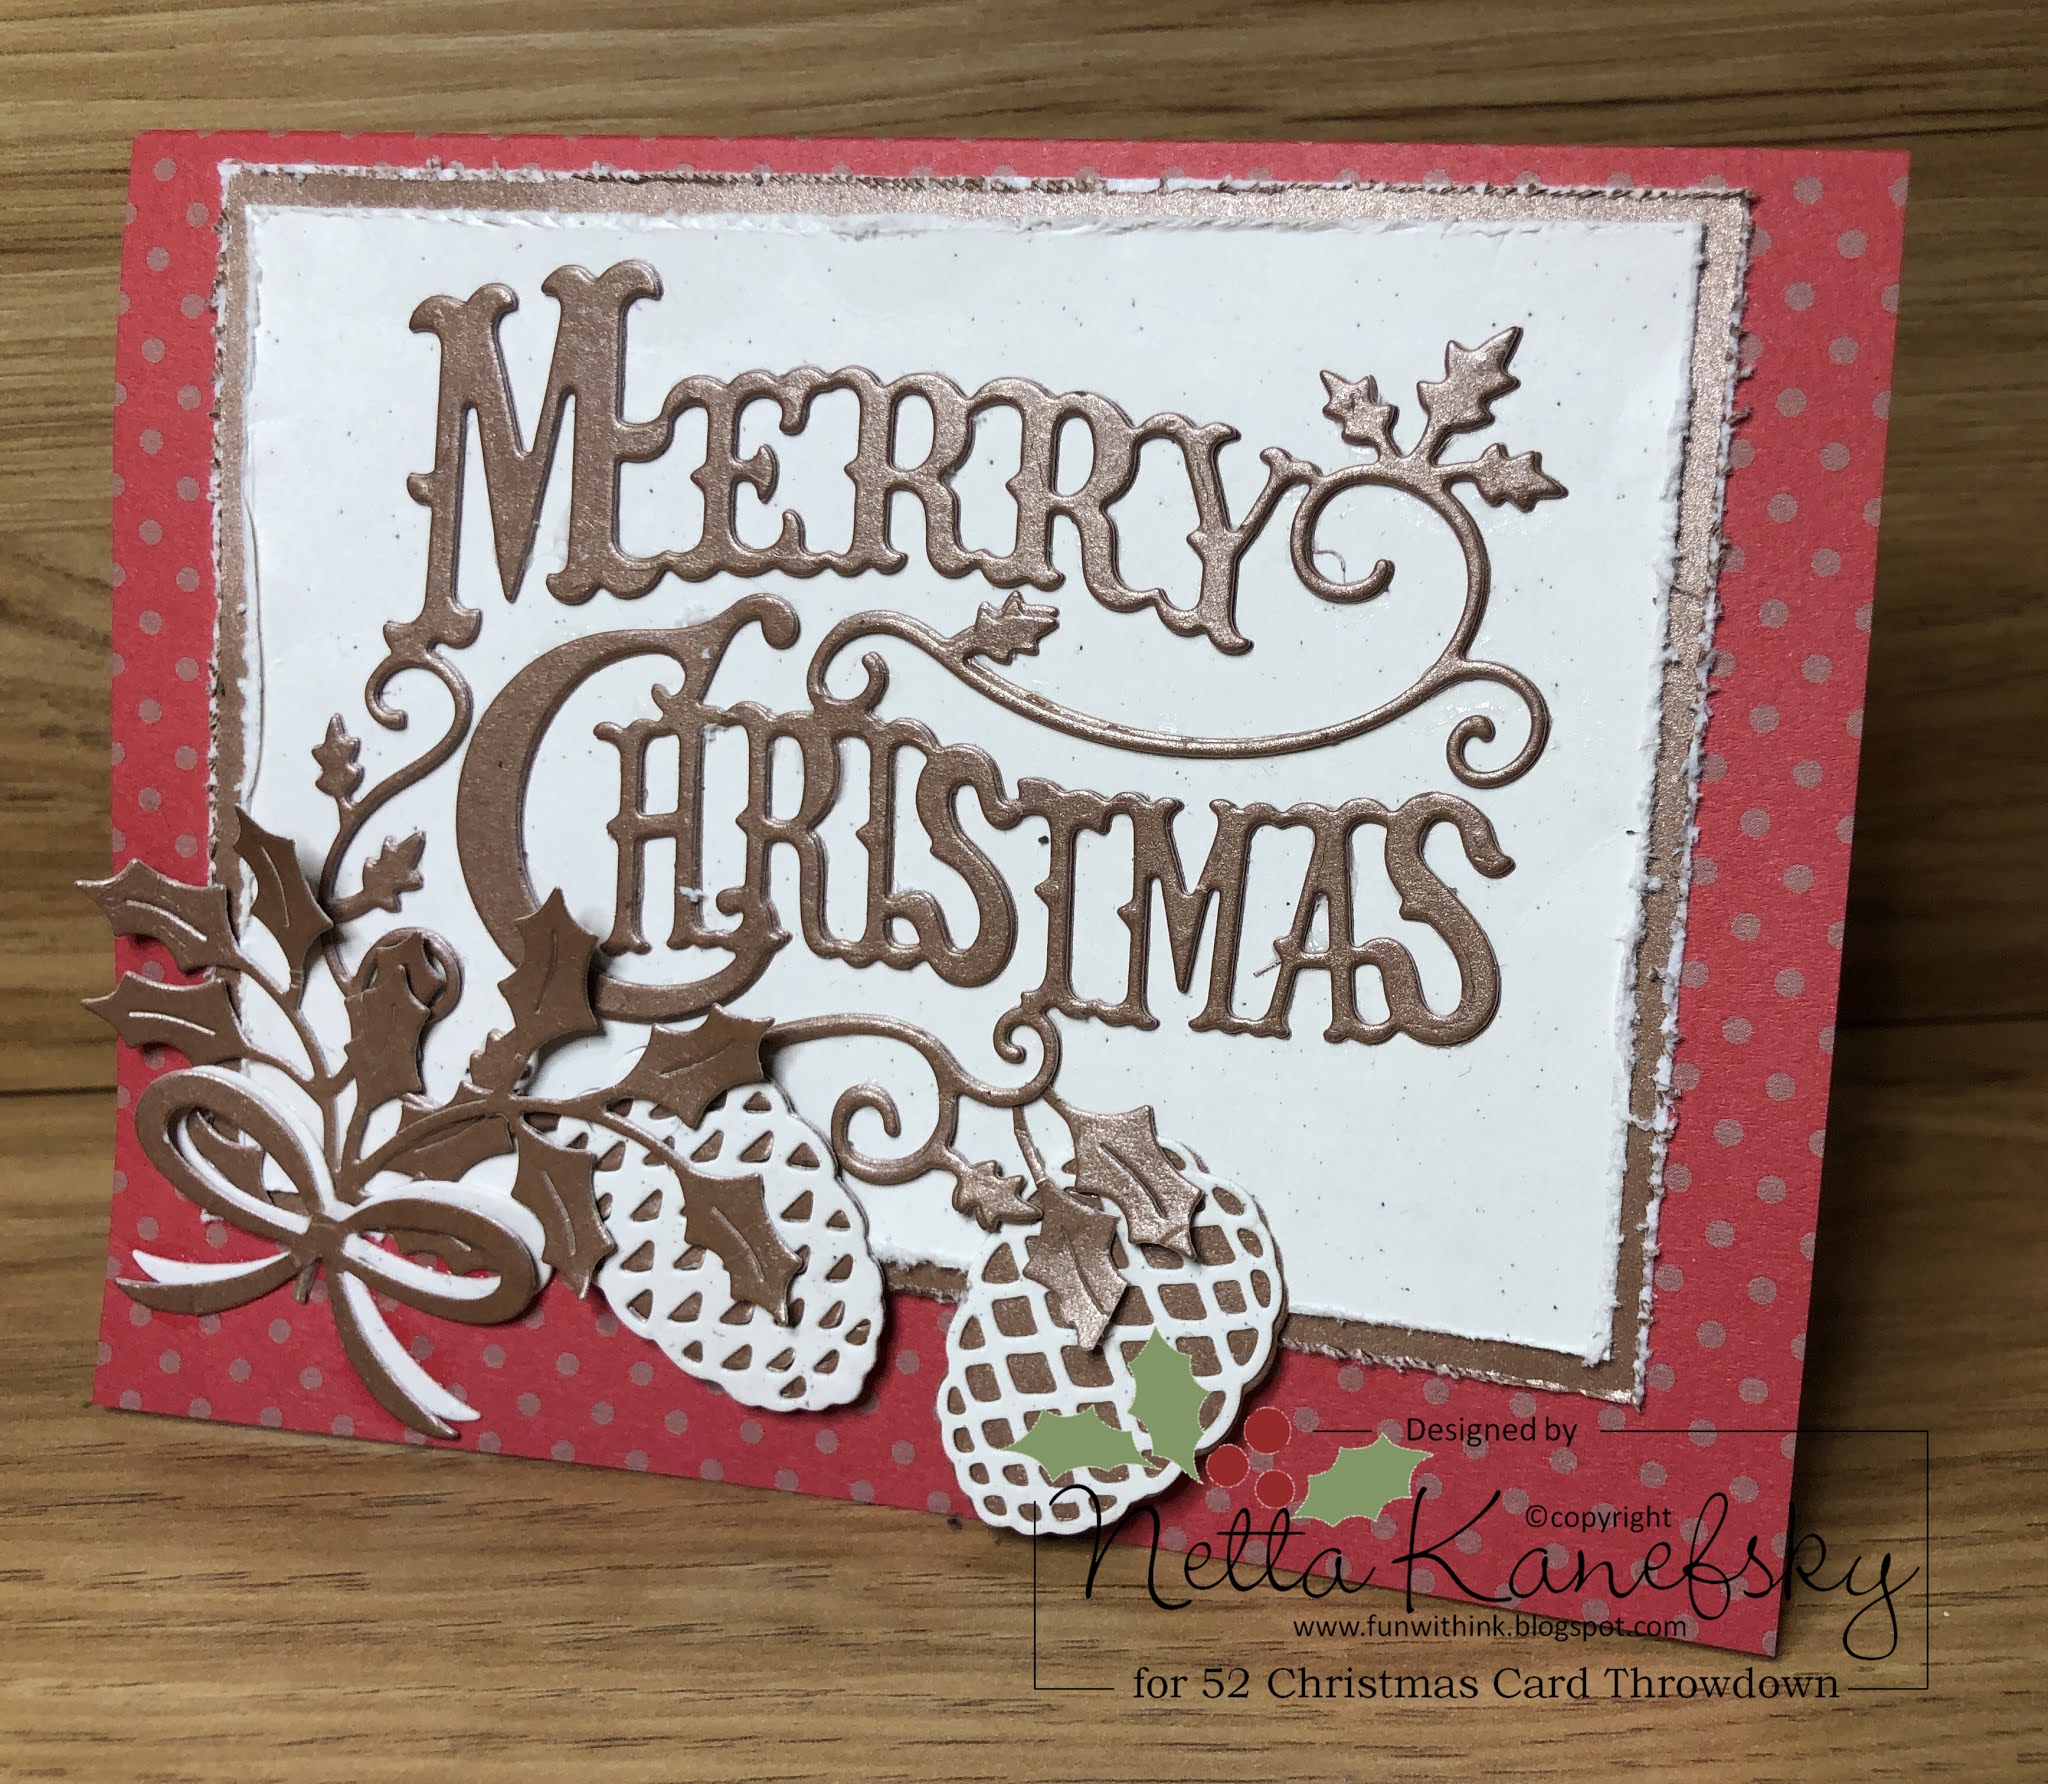
My card today uses just dies and does not have any stamping.


I flipped the sketch so the star was at the bottom of the card.  In place of the snowflakes I have pinecones.  In place of the star I have greenery and a ribbon.

Come join us at 52CCT & Card Making day and give this sketch a try!


Netta

 Ingredients:

Cheery Lynn Designs Merry Christmas Die
Stampin Up Pretty Pines Die
Penny Black Holly Flourish Die
Recollections Holiday Shimmer Cardstock
Pebbles Basic Card Making Asst Pad Cardstock
White Cardstock

Saturday, September 26, 2020

52 CCT September Technique Challenge

It's a fun challenge this week at 52CCT and Rosi's last challenge for September!  She has had some challenging challenges and this is a new one for me.
I have never done partial Stenciling so I was exited to give it a try.  


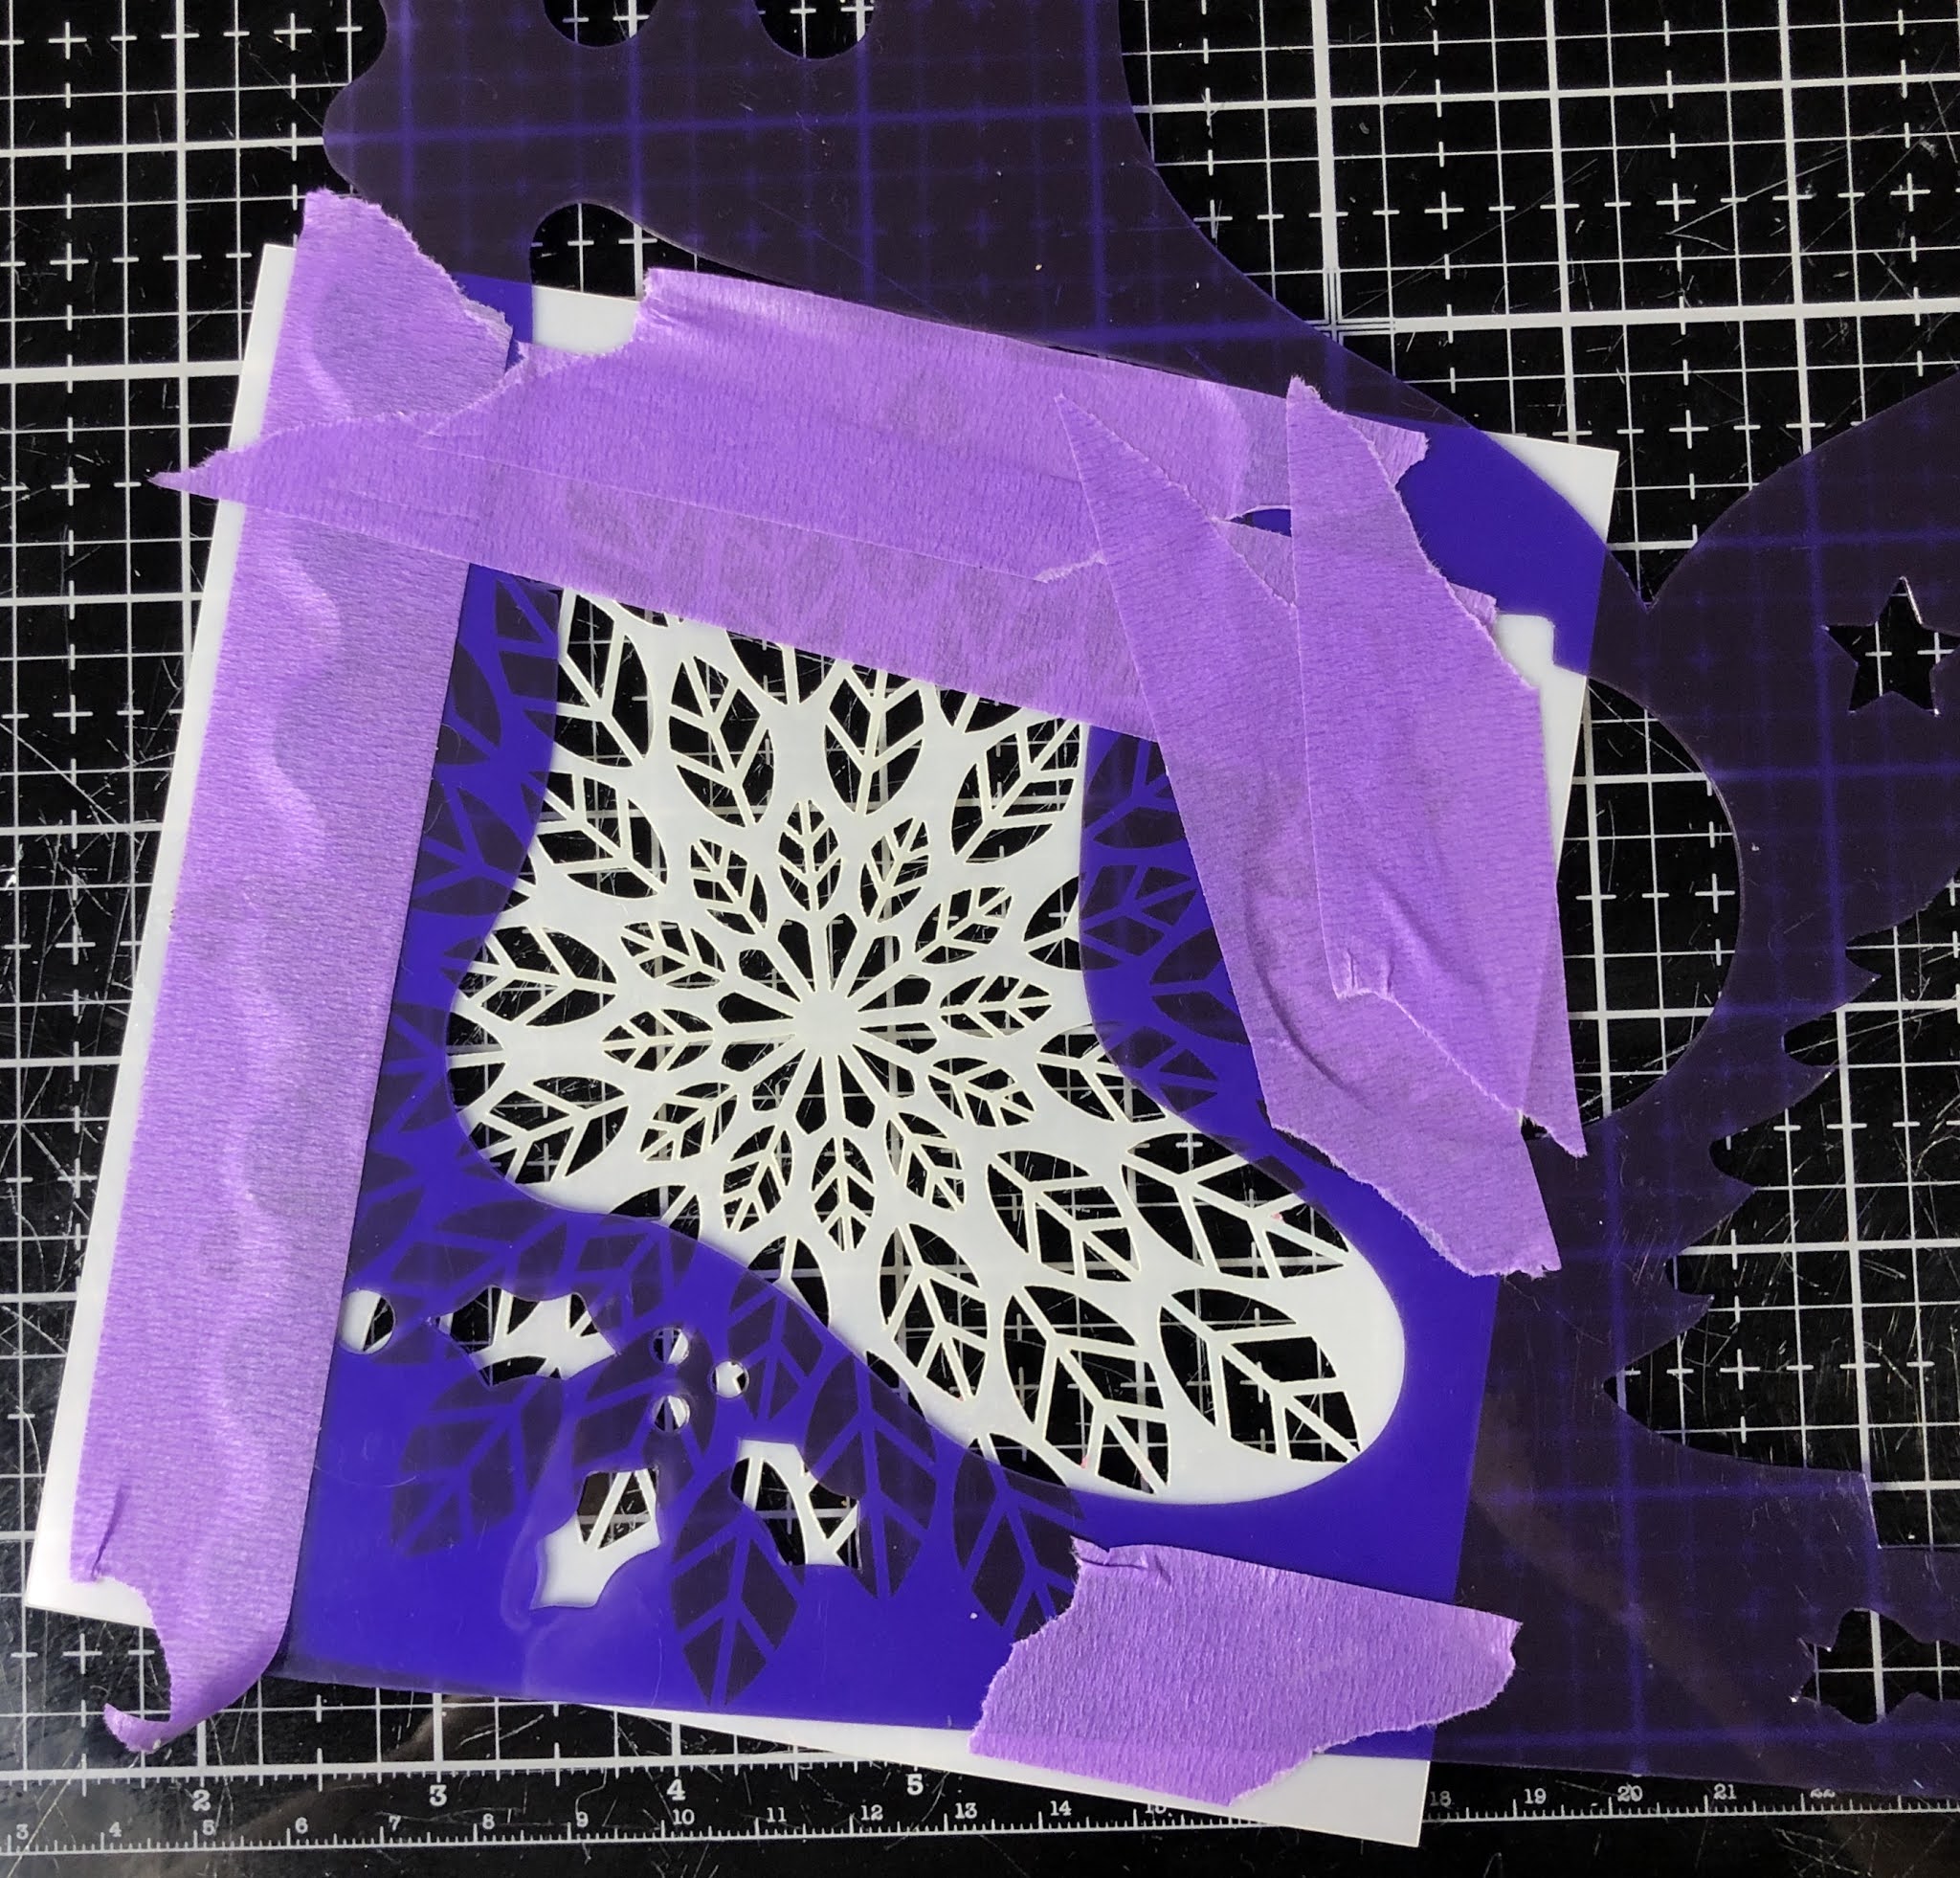
Basically what you do is mask off a stencil and use only part of it.  I used a Stencil within a Stencil on this card.  It was a big stocking stencil and I just taped my design stencil behind it.  I had narrowed my stencils down to 4 and had my husband narrow it down to one.  I think he choose a great stencil.  
If you notice, I taped off the top of the Stocking because I had a different plan for that area.


Next I spread transfer gel all over it.


It took about an hour for the transfer gel to dry.  You will know it is ready when it dries clear.
I had a foil that I thought would be pretty for this design as it had many colors in it.  


I hand cut out the stocking, making sure to get the top area too.  I used the stencil to trace just the top area so I could cut it out and cover in glue. I pressed white flock onto it and then glued the white area onto the top of the stocking. With green cardstock, I hand cut the evergreen leaves and punched out red for berries.


This was a fun challenge so I hope you all give it aa try and then come on over to 52CCT and load up your card!


Thank you for stopping by!

Netta


Ingredients:
Stocking Stencil
Altenew Leaf Burst Stencil
Deco Foil Transfer Gel
Heidi Swapp Rainbow Reactive Foil
Red Cardstock
Stampendous White Flock
Hole Punch
Green Cardstock
Tim Hotz Brick Embossing Folder
Spellbinders Holiday Sentiment "Noel"
Stampin Up Cherry Cobler Ink