Saturday, November 23, 2019

52 CCT November Technique Challenge


Watercoloring is the technique this week....something I have not really done before.  I have been wanting to make a Northern Lights card this year so I thought this would be the perfect time.
To tell you the truth, I was not fond of what I did but once I put it together, I loved it!
The frame and tree was popped up away from the background to give the background some distance.
I will have to give this a go again.  Was not difficult to spread watercolor paint on watercolor paper.  LOL


Have you done watercolor before?  Show us what you can do over at 52cct.  While your there...check out the other design team member's works of art!

Netta

Saturday, November 16, 2019

52 CCT November Theme Challenge

Does anyone hang candy canes on their Christmas trees?
Growing up, our tree was always filled with those sweet red and white stripe delicious candy.  My boys also got to enjoy the candy canes on the tree as they grew up too.  Still today, even though my boys are grown, I still hang them on the tree.  I guess they are a little bit of flash back to me when I was young and my kids were young. 
A tradition so minor but still means a lot to me to see them hanging there... more like an old ornament you hang year after year....not so much a sugary treat.

Todays challenge is about sweet treats.  I found this digital image at the Esty shop recently.  It is a KLM Designs called Candy Cane Gnome.  I colored him up with Derwent pencils and added Spectrum Noir Sparkle Pens over parts of the image.   


The red swirl background he is on is actually an old technique using shaving cream and some red re-inker.  Just get some cheap shaving cream and spray a nice thick coating in an old cake pan.  Drop a few drops of re-inker on it.  In my case, I just used red but you can add a couple of colors if you want.   You can use a stick, toothpick, knife or whatever you want and swirl it through the shaving cream.  The idea is to make a design with the re-inker in the shaving cream.  Don't go too crazy mixing because you just want a marble look.  Now take your piece of cardstock and lay it on top of the shaving cream, pressing down slightly into it to make sure the cardstock is covered.  Now lift off your cardstock and take a spatula or something flat to scrape off the shaving cream.  Take a paper towel and dab the cardstock.  Set aside to dry.  You can make several backgrounds with this one batch.  


The Stamping Palace Peppermint Candy background was stamped with a cranberry red pigment ink.
The picture above is a close up so you can see the "shine" on the gnome.
Don't forget you can always head over to 52CCT for more inspirations from the other design teams blogs.


Nearing the end of card making for 2019.  Hope you are as far ahead as I am!

Happy Crafting...
Netta

Saturday, November 9, 2019

52 CCT November Color Challenge

 Today is a new 52CCT challenge and it is a color challenge.
Can you tell what the colors are in this challenge?


Your got it...purple and white! The focus on the card is a large snowflake which is glued onto cardstock and acetate.   


When I first made the card, the front would not stay up.  It was too weak.  I added an additional layer of acetate glued together along the top and bottom.   I glued a 2" piece along the bottom front to match the 2" top.  To hide the glue on the acetate on the inside of the card, I attached two 2" pieces of purple cardstock along the top and bottom of the card.  Adding the extra also helped the front to be stronger.


I decorated the front by stamping purple snowflakes and added stickles to give it some sparkle.
Now it is your turn.  What can you come up with using purple and white?


I counted up my Christmas cards made and counted the list of people I need to make Christmas cards for.  I am so happy!  I am 3 over what I need!!  Which is perfect because I always need "just one more card" each year and end up scrambling to get it done last minute.  This way, I already have the "one more" done!  

Go me!!!
Netta


BoBunny Snowflake Stamps
Tattered Lace Christmas Snowflake Frame Die
My Favorite Things Stylish Snowflakes Die
Memento LuLu Lavender Ink Pad
Stampin Up Gorgeous Grape Ink Pad
Stickles Stardust
Purple and White Cardstock
Acetate

Sunday, November 3, 2019

Birthday Butterfly Box

A very good friend had a milestone birthday the other day and I wanted to make her a special card.  It is not one that folds but I was going to see her to give it to her.  This box card, once the top lifts off, releases a bunch of butterflies which look like they are ready to fly off.


Happy Birthday Jan!  

Netta


Distress Oxide ink pads:  Twisted Citron, Peacock Feathers and Mustard Seed
Stamping up Night of Navy ink pad
Sizzlits Die: Funky Brush Numbers
Navy Blue, White, Light Green and White Sparkle cardstock
Memory Box Butterfly Ensemble Model 30071 die
Memory Box Morning Garden Butterflies 30085 die
Ranger Rick Glossy Accents
Spectrum Noir Sparkle markers Soft Jade and Moonlight
Stickles Midnight Blue
Impression Obsession Die Leafy Branch and Foliage Dies
Impression Obsession Die Birthday Top Edgers Die
Stamping Up Flourish Thinlits
Inkadinkado Clear Stamps Meadow Floral

Saturday, November 2, 2019

52 CCT November Sketch Challenge

November Sketch...we are down to the wire at 52 CCT.  Can you believe it is already November and we are now at our last full month of challenges?  Where did the year go?  
If you have been following along, you would know at the beginning of each month we always start with a sketch.  I did not flip it or turn it this time.


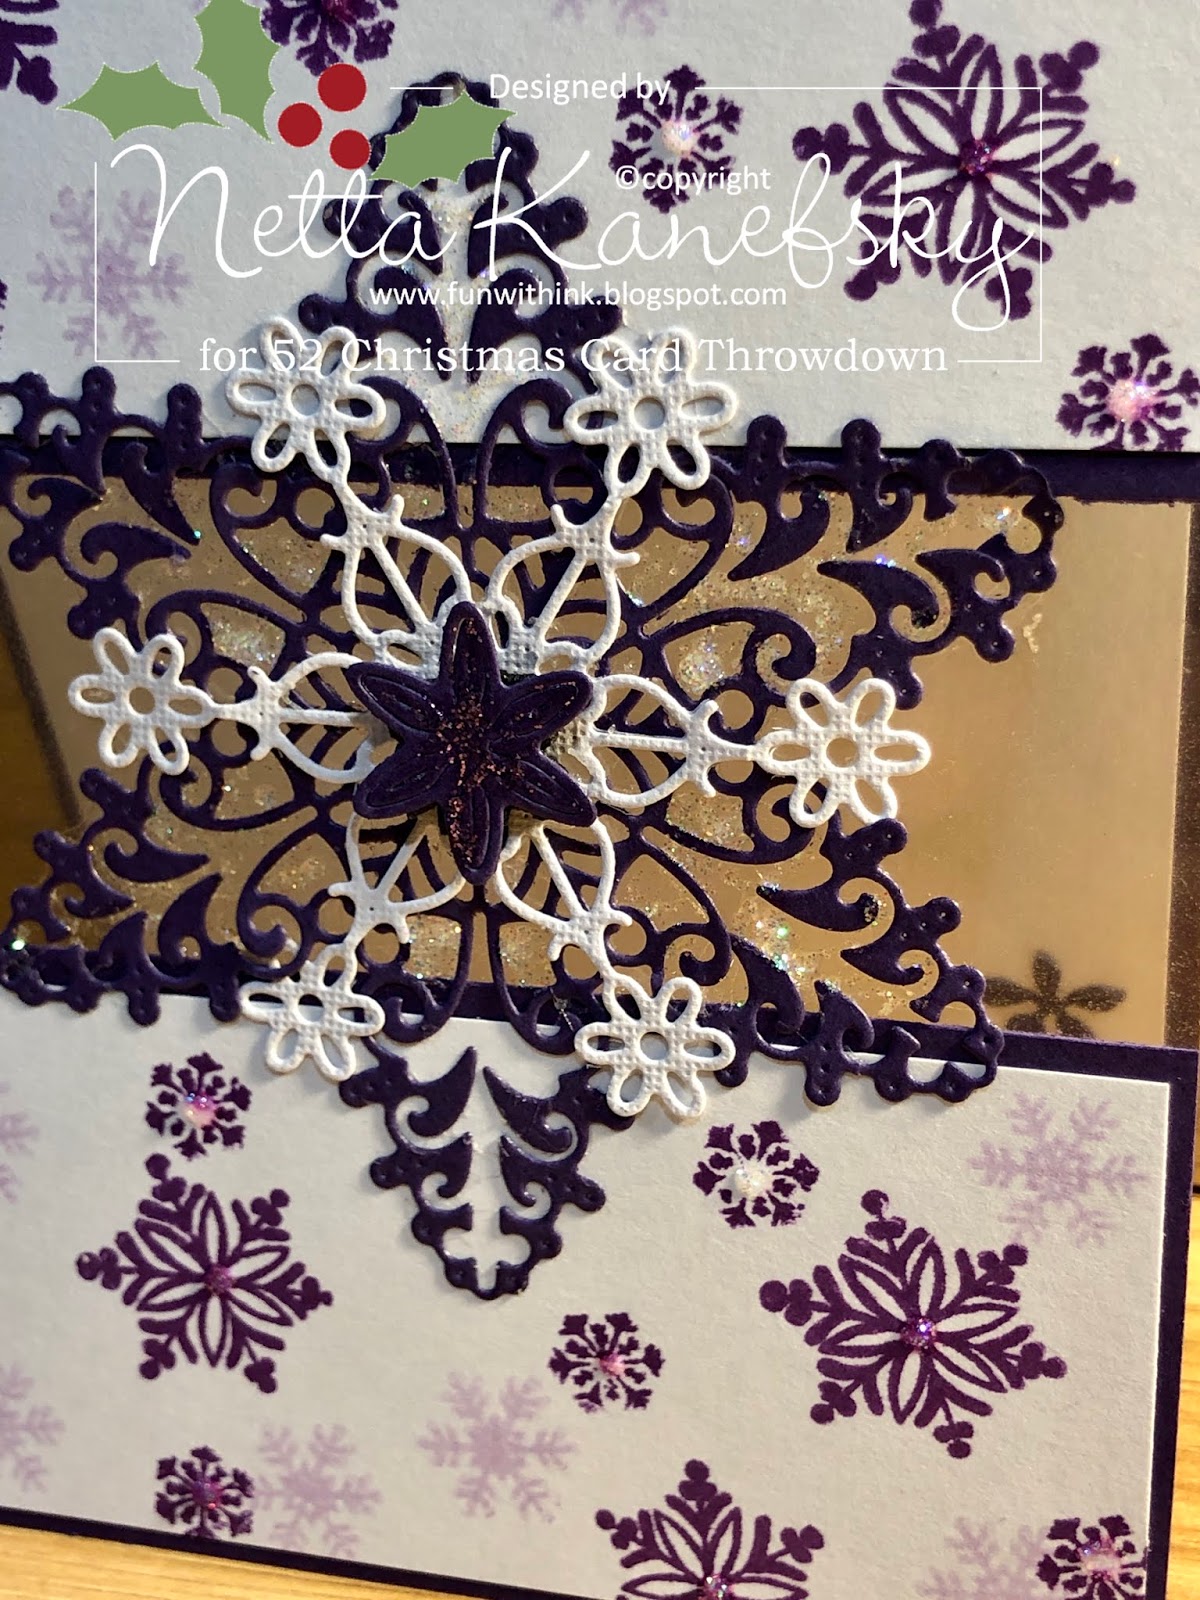
Most of the card was die cut except for the sentiment.  I did a bit of embossing for snow on the trees and edge of drift.  To do the trees, I just left the cardstock in the die after I cut it out and used a Ranger Perfect Medium embossing marker to fill in the open areas of the die so I could emboss.  I used the same marker to edge the drift as well to emboss.  The sentiment was stamped first in green and without moving anything, I cleaned off the stamp and inked it back up versamark so I could emboss the words.  


 Here is a tip:  You might have a couple of specialty embossing powders like Winter Wonderland but for the most part you only need clear!  If you stamp with color and emboss over it with clear, it is the same affect as if you embossed with color.  You not only save money by not buying all the ink AND embossing powders but you also save on space!  We all know how important it is to save space....so we can fill it up with something else..*Smiling* 
I used to be someone who bought just about every color of embossing powder until I finally figured this out! 

Here is the sketch.  I would love to see what you came up with. 


If you need more inspiration...head over to www.52cct.blogspot.com & check out the other designers creations.
Thank you stopping by!

Netta
The Paper Studio paper stack
Stamping Up Snowflake Sentiments
Nuvo Crystal drops Simply White Gloss
Ellison Die Holiday Shadow Box Dies
White Cardstock
Embossing Powder :"Winter Wonderland"
Viva Las Vegastamps! Embossing Powder "Clear"
Versamark Ink Pad
Re:Marks by Excelmark Pigment Ink "Florest Green"