Thursday, December 27, 2012

Silver Wreath


To make the wreath card, I found something to pencil a light circle where I wanted the wreath to be on my card.  I did not have silver cardstock so I used a silver inkpad and covered a piece of white paper really heavy with color.  After it dried (which took some time!)...I used a Martha Stewart bough punch to punch-out several silver boughs.  Using the circle as a guide to help me keep it round I glued down the boughs to form a wreath.  I used the bow easy to make the bow leaving the ribbon tails long in length.  I tacked the the bow down using my homemade glue dots in areas making the bow tails curve and lift up slightly.  I trimmed off bow tails to the length I wanted.
I stamped my sentiment on a piece of scrap paper that was cut to the size I wanted beforehand and glued it down.  
Before matting it onto the black cardstock, I punched the holes all the way around the card first.
The black, silver and white of the card gives the card an elegant look I think. 

New Years will be here soon.  Do you have a New Years Resolution picked out?  
I don't normally make a New Year Resolution...but I am considering one for this year.

Have a wonderful day!
Netta

Wednesday, December 26, 2012

Stampin Up Christmas Cards

A several weeks ago, I went to a card class run by Lisa, my good friend and Stampin Up Representative.  Here are two of the cards we made there.  


thank you for stopping by!
Netta

Christmas Napkin Card

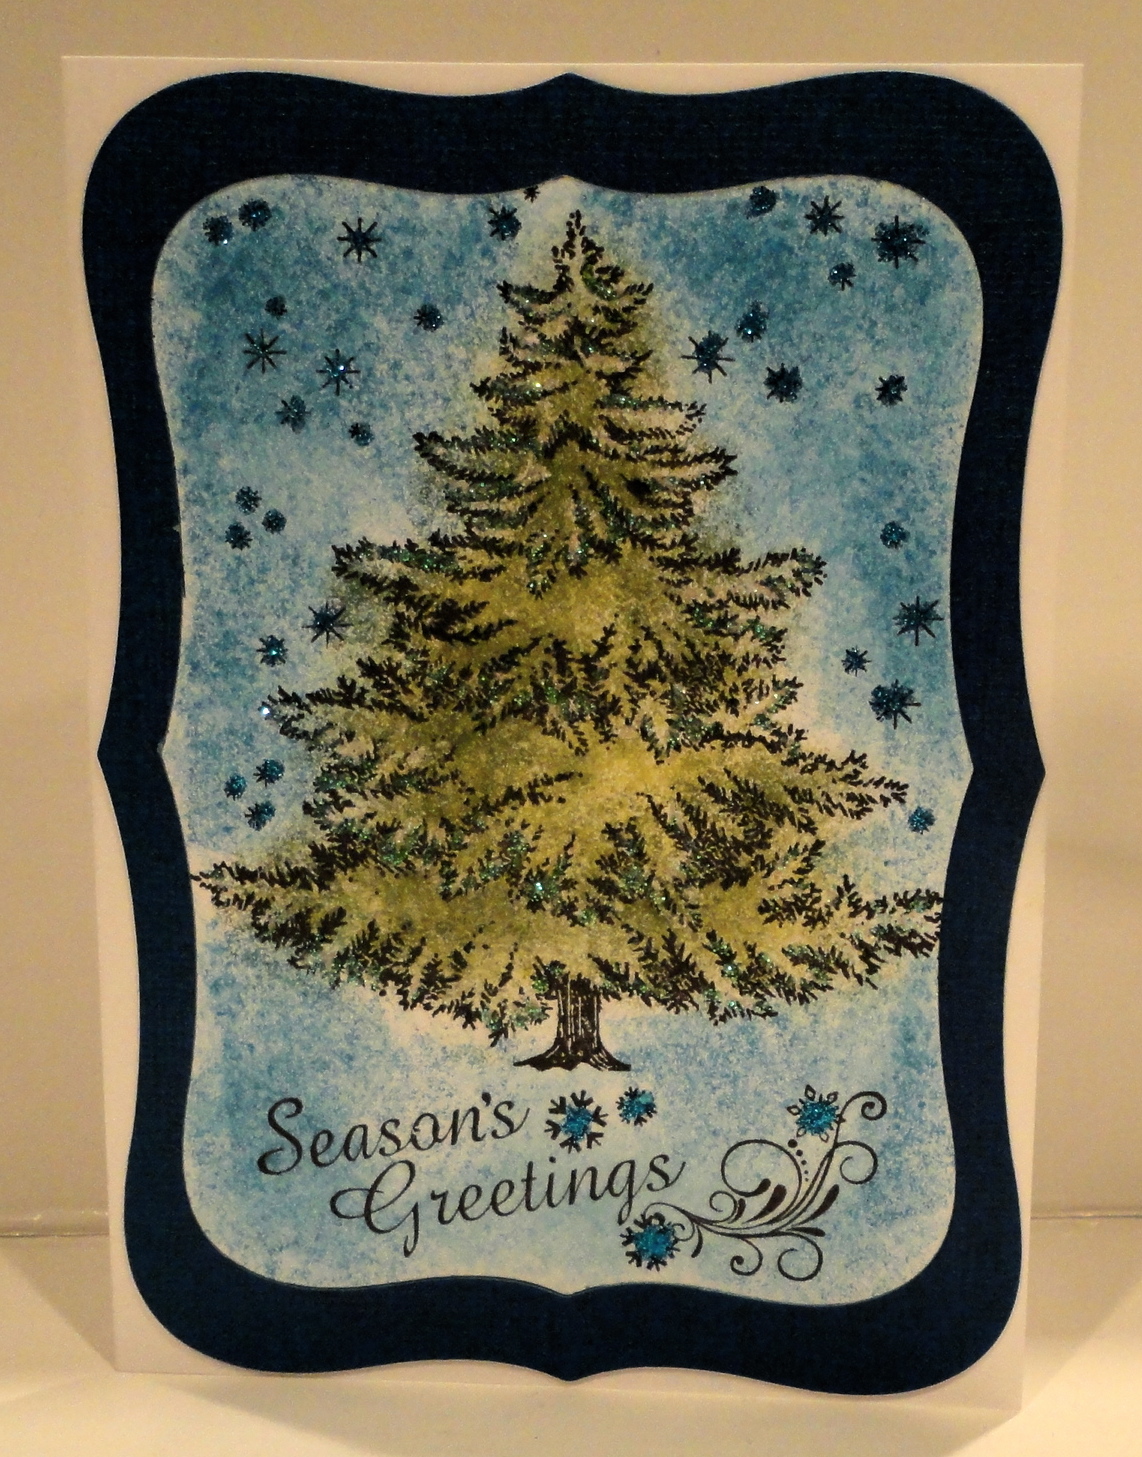
Did you know that you could make a card out of napkins?  Better yet, make an invitation that you can coordinate with any party theme?  There are so many cool looking napkins out there that you could use and for so many occasions!  I found a package that was perfect for a Christmas card.  This particular napkin could only be used once but some napkins (depending on the size) could make 2 to 4 cards off one napkin.  

The card is easy to do and does not have to involve any stamping unless you want to stamp on the inside.
All you need is 

IRON (heated w/o steam)
CARDSTOCK FOLDED IN 1/2 
(I used 4 by 5 to fit in my envelopes)
PLASTIC WRAP (Seran Wrap)
OLD MAGAZINE
DECORATED NAPKINS 


Step 1:  Most napkins are 2 ply or 3 ply.  You only need the top ply which is the decorated piece.  Carefully pull the decorated ply away from the others.  It is best to start at one corner and work your way all the way down.  Just keep the top ply and use the remaining ply to clean up your area later. *S*

Step 2: Open up your old magazine and lay your card down on it..making sure the front of the card is facing up 

Step 3:  Cover the card with a piece of plastic wrap that is slightly larger than the card.  It will all be trimmed off later.

Step 4:  Put your napkin face up over the plastic wrap & card in the desired position you want.  Make sure you have the decoration of the napkin where you want it to be.  For this card it was easy for me to just match up the one corner of the decoration because the rest of it was just white space.

Step 5:  Close a couple of pages of the magazines over your card, plastic wrap and napkin sandwich.    Press the iron down onto the magazine for 15 seconds so the heat penetrates through the magazine and napkin onto the plastic wrap.  Make sure to get the entire card...especially the edges.  Allow it to cool for about one minute before you pull back the magazine pages to check if the napkin adhered to the card.  If not, just close the pages and redo the area that did not stick down.

                         Step 6:  Trim down excess to the size of the card.  That is it!!  Now the card is ready for you to embellish more or you can do like me and leave as is.  Inside you can print your sentiment out and glue it to the inside or stamp.      

I hope you all had a wonderful Christmas!  I know that I did!  Matter of fact..it isn't over for us yet.  We have friends who arrived last night and we will celebrate once more.
It is the good feeling being surrounded by people I love.

Merry Christmas
Netta

Sunday, December 23, 2012

Snow Cabin & SnowMan


 First I have a Cabin with snow.  I use the crayon resist technique on this card.  I used a white crayon and colored all the areas I wanted to stay white for snow and then sponged on the color.


Here I have a Snowman done up in purples.  Not my typical color scheme on a Christmas card but he came out cute.  I love this guy!  It is a very old stamp that I make sure to use each year. 
The snowman was stamped and colored on the inside of the card so I put a window on the cover.  Now you can see him when the card is closed or open. 

*do not pay attention to the black spot on the card!!  my  camera apparently had a piece of dirt on it when I took the photo!!*


Thanks for stopping by!

Netta

Saturday, December 22, 2012

Candle Burns Bright

I have not giving away this card yet.  I am trying to decide between two people whom we will see next week.  

Or perhaps......I might just keep it!

~hugs~
Netta


5 More Christmas Cards!

Are you ready yet for Christmas?  We are down to just 3 more days to shop for Christmas.  I have all my cards mailed, all my gifts bought, packages mailed and received.  I just need to wrap three that are for here.

Here are a few more cards I made.  I need to get a different program or camera as the ones I have just do not show the glitter in the photos.  This first two cards have so much sparkle on them and yet the photos just shows a little.  Use your imagination...lol

Enjoy!

Netta


Wednesday, December 19, 2012

2 Santa Tags

One of my daughter-in-laws asked me to make a couple of big tags so Santa could attach them to each of my grandchildren's gifts.  She wanted tags she could reuse over and over....

She said she loved them...and as usual...I went over the top...she didn't expect them to be so beautiful!   Those who know me.... know that is me! lol

I wanted one layer so no parts would fall off over the years.  Also it would make it easier if she wanted to laminate them to preserve them.  I could not get the sparkle to show up when I took the photos...just know that they have glitter on them....it is for Christmas and Christmas is all about sparkle and glitter! 


Hugs
Netta

Winter Wonderland 2012

A scene I wish I could really see!  I miss seeing snow so much this time of year.  Since I can't...I put my memories onto cards.

I made several of these cards as they went quick.  A piece of ripped paper, a sponge, ink, red marking pen and a couple of stamps.

Vendors at the office were the recipients of these cards to thank them for the year.


Thank you for stopping by!
Netta

Tuesday, December 18, 2012

Poinsettias

3rd Post For Today

Here are two Poinsettia cards I made.  They both use the mask technique so that I could get the evergreens behind the flower.  

The first card was stamped with sticky glue and then sprinkled with the red flower soft I made


This next card was just stamped with red ink for the poinsettia.


Seasons Greetings Pink, Blue and Multi

*Post #2 for today*

Since I am very behind...I am just going to upload several Christmas Cards at a time.

I hope they inspired you to make one or two cards this year!  There's still time....7 days to go! I was inspired by Scrap Journey to make these cards.


Netta

Hanukkah 2012

I have a new computer...MacBook Pro and FINALLY I can upload photos of my cards to my blog!
I need to catch up!

I have been very busy making my Holiday Cards since July.  I have Christmas cards for my side of the family and Hanukkah cards for my husbands side.  
Here are the Hanukkah cards I made.  

I saw a lot of cards using the Triple Time Stamping and I decided to give it a try.


Netta


Thursday, October 4, 2012

UUGGHHHH!!!

I have been trying for weeks to post photos and everyone of them are loading up sideways or upside down!!  I have no idea what is going wrong!!  I have so many to share with you.

It is right in the computer but when I upload....*sigh*.....one of these days I will get it figured out...but for now...it is so frustrating!!!


Manetta

Tuesday, May 29, 2012

Be Careful What You Wish For....


Is this not funny or what!!  
I found the image of the woman stripping off the good looking parts on the internet. 
    This was a birthday card for one of our sons.  

I can't wait to hear what he thought about it!!

have a great day!
Manetta

Monday, May 14, 2012

A "What Ever" Card


Impression Obsession rubber stamp image colored, glittered, cut and glued on cardstock to create a generic card...sitting....waiting... to go to the appropriate home!!

hugs
Manetta


Monday, April 30, 2012

Mothers N Others Day


30 Mothers N Others Day cards....all done!!
My husband puts on a Mothers Day Event for the Alzheimer Patients at the nursing home.  It is for the Mothers and "Others" (Care-givers).  It is a big event...everyone dresses up in their best...there is a wonderful meal, lots of memories and tears.  It started out with me volunteering to make the invitations several years ago and now has turned into a yearly event.  Many look forward to the hand-made invites that are sent.  


It is the only time I make so many cards alike and not something I enjoy doing but it sure feels good to know that they are going to those who really appreciate them!

This Beautiful Alzheimer poem was added inside the invite

When I was lost, you showed the way.
When I was frightened, you calmed fear away.
You made me laugh, when I wanted to cry.
I fail so often and you tell me; “Just try.”
You are my friend, and I forgot your name.
I called for help and it was you; who came…
by Tim Brennan


thank you for stopping by!
Manetta

Sesame Street is coming to the Party

In June one of my granddaughters will be 2.  For her birthday, she is having a Sesame Street Birthday.  I made these characters as part of the decorations.  I made patterns out of cardboard and cut out all the pieces with scrap paper to try to match the characters as much as possible.  If you click on each picture, it will open up larger.


Here is some of the mess that was on my desk from the pieces of paper!


Every thing was cut from a piece of paper from eyes, noses, arms, stripes, shoelace etc!  After all the pieces were put together, I backed them all with black cardstock, cut the edge leaving a trim.   It was time consuming but I had a lot of fun.  I am sure even granddaughter at only 2 will enjoy them!

Manetta

Wednesday, April 25, 2012

Digital Birthdays


My brother-in-law had a birthday last week so I made him a couple of cards!  Both are digital downloads from Bugaboo Digi Stamps colored by Twin Touch Markers.

Thank you for stopping by!
Manetta

Sunday, April 22, 2012

Stamping Up Class


I had not been to a stamping class in many months so I decided to set time aside and join  Lisa Reber-Gulfcoast Stamper once again.  These are two of the cards we made that night.  I have fallen in love with the flower stamps and punch on the birthday card.  I can't wait for my order to come in so that I can start using it!!

~hugs~
Manetta

Friday, March 30, 2012

Teddy Bear Cutie


A colorful cute birthday card!!

What can I say...*S*

Have a great day!
Manetta

Monday, February 27, 2012

So Serene


I discovered if I used Core'dinations Black Magic Collection cardstock and an embossing folder with my cuttlebug, the color on the backside popped through the front.  It is the cardstock that you can sand or tear it and the secondary color will show through but this way I did not have to sand it. The Stamping Up Elegant Lines Textured Impressions Embossing folder is what I used is to create my background. I used three colors with a sponge to create the sunset and a rubber stamp from the Stamping Up set Inspired by Nature for the cattails.  To make the cattails, I used a punch (I believe has been retired from Stamping Up) to punch out the cattails and glued them down. 

A nice serene card!

Manetta 


Thursday, February 23, 2012

Sympathy and Daisy

My husband is after me again to make more sympathy cards so I made him a couple the other night.  I used my  Touch Twin markers to color the flowers and used a white pencil to highlight.  Same technique but each card a little different.


thank you for stopping by and looking!
Manetta

Tuesday, February 21, 2012

My New Toy-Sew Stamper

I ordered a new tool and got it in the other day.  It is from We R Memory Keepers and it is to create faux stitches on your creations.  It came with several attachments to change the type of stitch.  I only tried the straight stitch so far.  It is black self-inking stamper and is suppose to get over 1,000 impressions with it. I practiced on scrap paper first.  I was pleased to see I did not have any issues keeping it straight nor did it skip.  The black ink went on very smooth and even.  I am already thinking they need to come out with white ink for darker cardstock!

Along the top and along the bottom of the main image, you can see where I used the tool.  In the sentiment area, I hand drew them on.  You can definitely see a difference!


thank you for stopping by!

Manetta

Wednesday, February 15, 2012

Happy "Late" Valentines!

This will be a quick post.  I have been so busy with tax season for the past two weeks I have not even been in my craft room hardly!  I did manage to make a couple of cards to mail to my grandchildren.  Wanted to post them yesterday but I came down sick =(...so here they are!!  The images came from coloring book digital images online.  


Ok...back to sorting paperwork!! ugh..

Manetta

Sunday, February 5, 2012

Happy Birthday Chelsea


My granddaughters birthday today!!

Happy Birthday Sweetheart!!

love you

Grammy K

Friday, February 3, 2012


Stamping on Sunset Photos!

Easy...Pretty...Quick

I love it!  

To review how to stamp on photos...please go to this post Photo Stamping

*S*
Manetta

Tuesday, January 31, 2012

Valentine Jasmine


Valentine Jasmine...perfect Valentine card for my granddaughter who LOVES the Disney princesses.  
I got this image from a coloring page online.  I used my new Touch Markers to color the image.

The inside of the card has lots of sparkles!


Manetta

Monday, January 30, 2012

Jan 13th Stamping Up Class

Two weeks ago, Jan 13th,  I went to a local Stamping Up Class held by Lisa (Gulf Coast Stampers and Scrappers).  I had not been in a loooong time.  It was good to see old crafting friends again!

Here are the cards we made that night!


I waited to stamp this flower card until I got home.  I wanted it to be a card I could use for a thank you type card.

thanks for stopping by!
Manetta