Showing posts with label valentines. Show all posts

Monday, February 4, 2019

Lemur's Love


Popping in to leave a quick post on a valentine card I made today.  The image I used is such an adorable Lemur image from Mo's Digital Pencil!  Was easy to color up with my copics.
For the eyes:  Y #11, #15 and #17
For the body:  C  #00, #3, #5 and #7
Paper came from Stampin Up paper pack "Sending Love".
Edge of the paper was cut with Die'sire "Decorative Edges" metal die set.  I also used that same die to cut out a skinny edge from scrap glitter cardstock.

2 Valentines card down and 2 more to go!  I can do this!


Sunday, February 3, 2019

Sweet Valentines Day


This image is so adorable!  I joined a group called Simply B Stamps on Facebook.  We got "Peppermint Betty" image free for the first 2019 Progressive Challenge.
This challenge included absolutely no red in any shape or form, must use two scrapbook papers, one embellishment and the image on a full project.
My two different papers were used on the background.  I cut a shape out of the purple diagonal paper and glued that down onto the pink polkadots.  I made my own stitch marks with a black pen.  I used a heart punch and punched out 4 hearts.  I colored them with Spectrum Noir Sparkle Pink Garnet and Inspired Violet.  Glued them down onto the pink polkadot paper.
Am I the only one who ends up with color all over their fingers after using the Spectrum Noir Sparkle glitter pens?  They do not come off your hands very well!
Next up was Peppermint Betty. I let my background paper be the judge of what colors my image will be.  I have never colored any hair other than brown or blonde so coloring pink was way out of my comfort zone.  After it was done, I kinda liked the different look!   It was difficult to get a good camera image as the hair looks like it has red but it is a mix of pinks and purples. The Copic colors I used in the entire image was...
RV #10 13 34 66
V 25 28
R 83
BV 00 23
E 00 11 13
C 00
After I was done coloring I used the following Spectrum Noir Sparkle colors on the hair, dress, cake and canes to get sparkles...
Cosmos
 Macaroon
 Pink Garnet
 Inspired Violet
I fussy cut Peppermint Betty out and popped her up on top of the background.  I printed the words onto scrap polkadot pink paper and made a tag out of it and added it to the upper left.  I used the black pen to make stitch marks on it.
Last to be added was the required embellishment... 3 pink rhinestones in the corner.


This was a fun card to make.  Now that it is done, I am off to go add it to the challenge.  
Happy crafting day!

Wednesday, February 8, 2017

Valentine's Day Cards

This year I bought 4 digitals images from Mo's Digital and right now there is a great sale going on for the Valentine images.  
Spent Sunday coloring while waiting for the big game to begin. On Monday morning, all 4 were mailed off!  I wish you could see the sparkle on each card but I still struggle with trying to get the glitter to show up when I take a photo.  I used the Spectrum Noir Sparkle Glitter Brush Pens on each card and they look super cute.  The images were colored with a mix of Copic and Spectrum Noir markers. 

(click on each photo to enlarge)


I am not a huge lover of Valentine's Day.  I try to get my husband to stop buying me something.  He normally buys me a fruit bouquet which I share with everyone at the office.  I think it is a day for companies to make money.  I believe we should be showing love 365 days a year in many small ways each day.

With that said.....kids do not understand it all.  They think of it as a nice party day at school!  Being one who loves to make cards, I can't pass up making my 4 Grandkids a Valentine card but they are the only Valentine's Day cards I make.  

Thank you for stopping by!
Manetta

Friday, January 8, 2016

Puppy Love

I got a digital image from Tiddly Inks that was just perfect as a Valentine card.   I printed the image twice on Georgia Pacific cardstock but only cut out and colored the heads on one.  The other image I colored the entire image using a mix of Spectrum Noir, Copic and Blick Studio.   I am trying to use up extra paper so I found some Paper Studio red glitter cardstock in my stash that was perfect for punching out the hearts and for the border.


After the card was all put together, I placed the heads upside down onto a soft mat and used a McGill 8mm stylus tool to rub carefully only on the areas of the snouts, bow, bowtie and little heart necklace to make them puff out.  Before I glued them down onto the images, I used favorite decoupage glue where I had just used the stylus tool because once dried, there was no way those areas would be pushed flat!

Here are a couple more photos.  I tried to get some good photos so you could see what it looks like puffed out.


This card went together pretty fast.  One down and 5 more to go!

I am entering this card into two challenges..
1)  The Outlawz-Twisted Thursday Challenge: Anything goes and the twist is to use a pet/animal on it.
2)  Danni's January Heart Challenge

Thank you for stopping! Feel free to leave comments...I love them!
Netta


Monday, February 16, 2015

SBR-Us Challenge 61-Valentine Heart

Hello Hello!!  
Merry Christmas
Happy New Year
Happy Valentines Day
Did I miss anything while I was away?

Yes I am still here!  Yes I have still been making cards.  Just time got by me so I apologize!

I am taking a much needed break from busting out 130 Christmas Cards which I used all but 4 cards.  Not much of a head way for 2015 Season but I will get there soon enough.  Lately I have been practising on how to color images for my cards.   The classes that I am taking are from Kit and Clowder.  If you ever wanted to take a class to color images (all types of alcohol markers, pencils and watercoloring), ...now is the time!  Not only is the time is right due to the ratio of Aussie to USA but the classes themselves are the best!  Lots of support, feedback, videos and complete books you can print out.  Right now I am taking the skin and hair class.  I colored an image for my husband's Valentine first and then I did the class.  
WHAT A DIFFERENCE!!!  The classes really work...lol

My first attempt looks like she hit the tanning booth and got a yellowish tan..UGH..


Here is my card after the first two lessons in the skin and hair class.  Many more to go as you can tell.  At least I have a "before" and will have an "after" as soon as I finish the coloring hair lesson.  That class is next in the lessons.  My husband loved the card and saw beyond the fact that the hair needed serious work.   That is what you call love *S*.


I bought this image from Slinky Tart and is called "From The Heart".  She has some serious cute images!  Will be buying more in the future from Slinky Tart.

Thank you for stopping by!
Netta

Friday, February 14, 2014

Happy Valentines Day!


This is a free Digital image from http://www.meljensdesigns.com/ that was printed on white cardstock, cut down to size and colored with Touch markers.  I printed another on printer paper and cut it out to mask the image.  With sponge, ink and a ripped piece of paper towel...I went to town making clouds and grass!  The edge was distressed.  The heart with red glitter frosting on the cookie topped off the card!

Happy Valentines Everyone!
Netta

Sunday, February 9, 2014

Mickey & Minnie Box Valentine

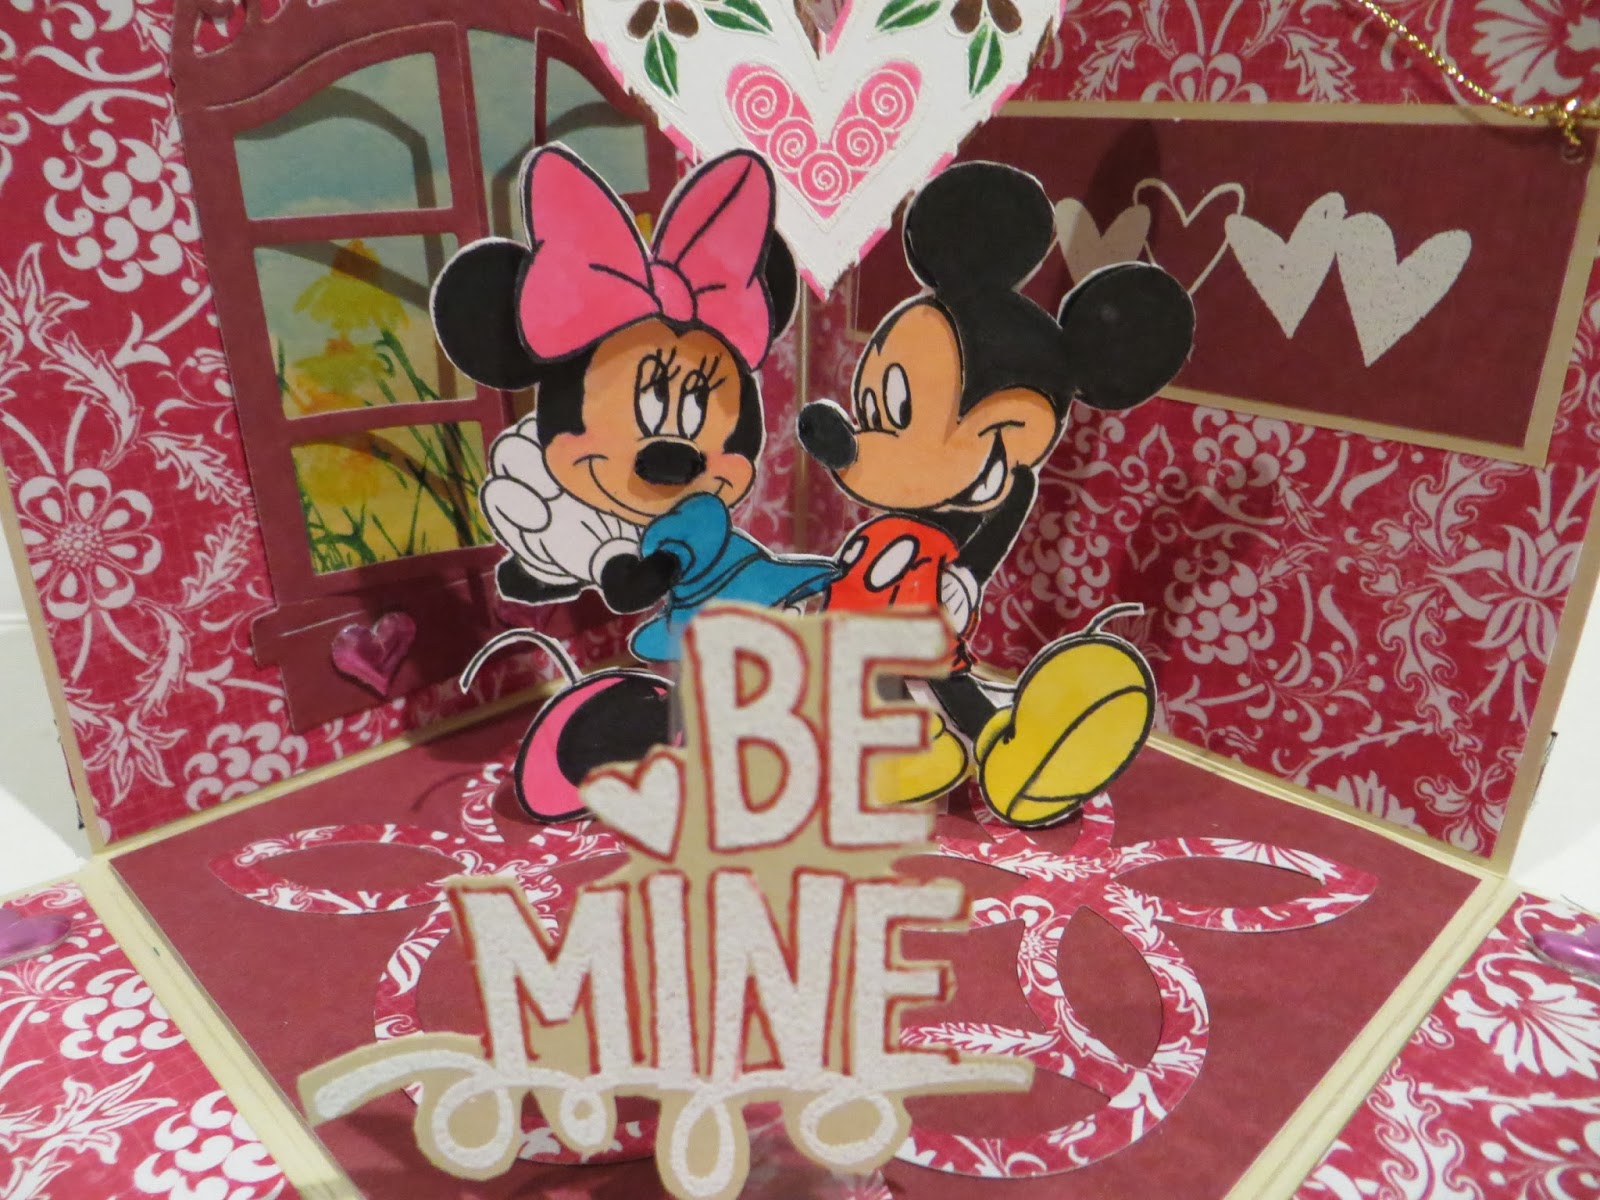
I have been wanting to make a Exploding Box Card for a long time.  I finally bit the bullet and tried it out.  Mine was one layer only.  I wanted it look like part of a living room with Mickey standing there proposing his love to Minnie.  

The box is completely 4" square.  You can see the directions I used was a video at http://www.youtube.com/watch?v=E9KWY63kbzI.

I did not want two sides to fall and realized it after I got the box all cut and folded.  The easy fix was to put a ribbon decoration around the bottom and around the top edges of the box.  I split the ribbon on either side of the two I wanted to drop.

Minnie Mouse and Mickey Stamp is a set I have had for years.  I tried to search it online but did not have any luck.  On the stamp it states "Disney All night Media #54J02.

Here are the pictures.  Enjoy & Happy Valentines!

Netta

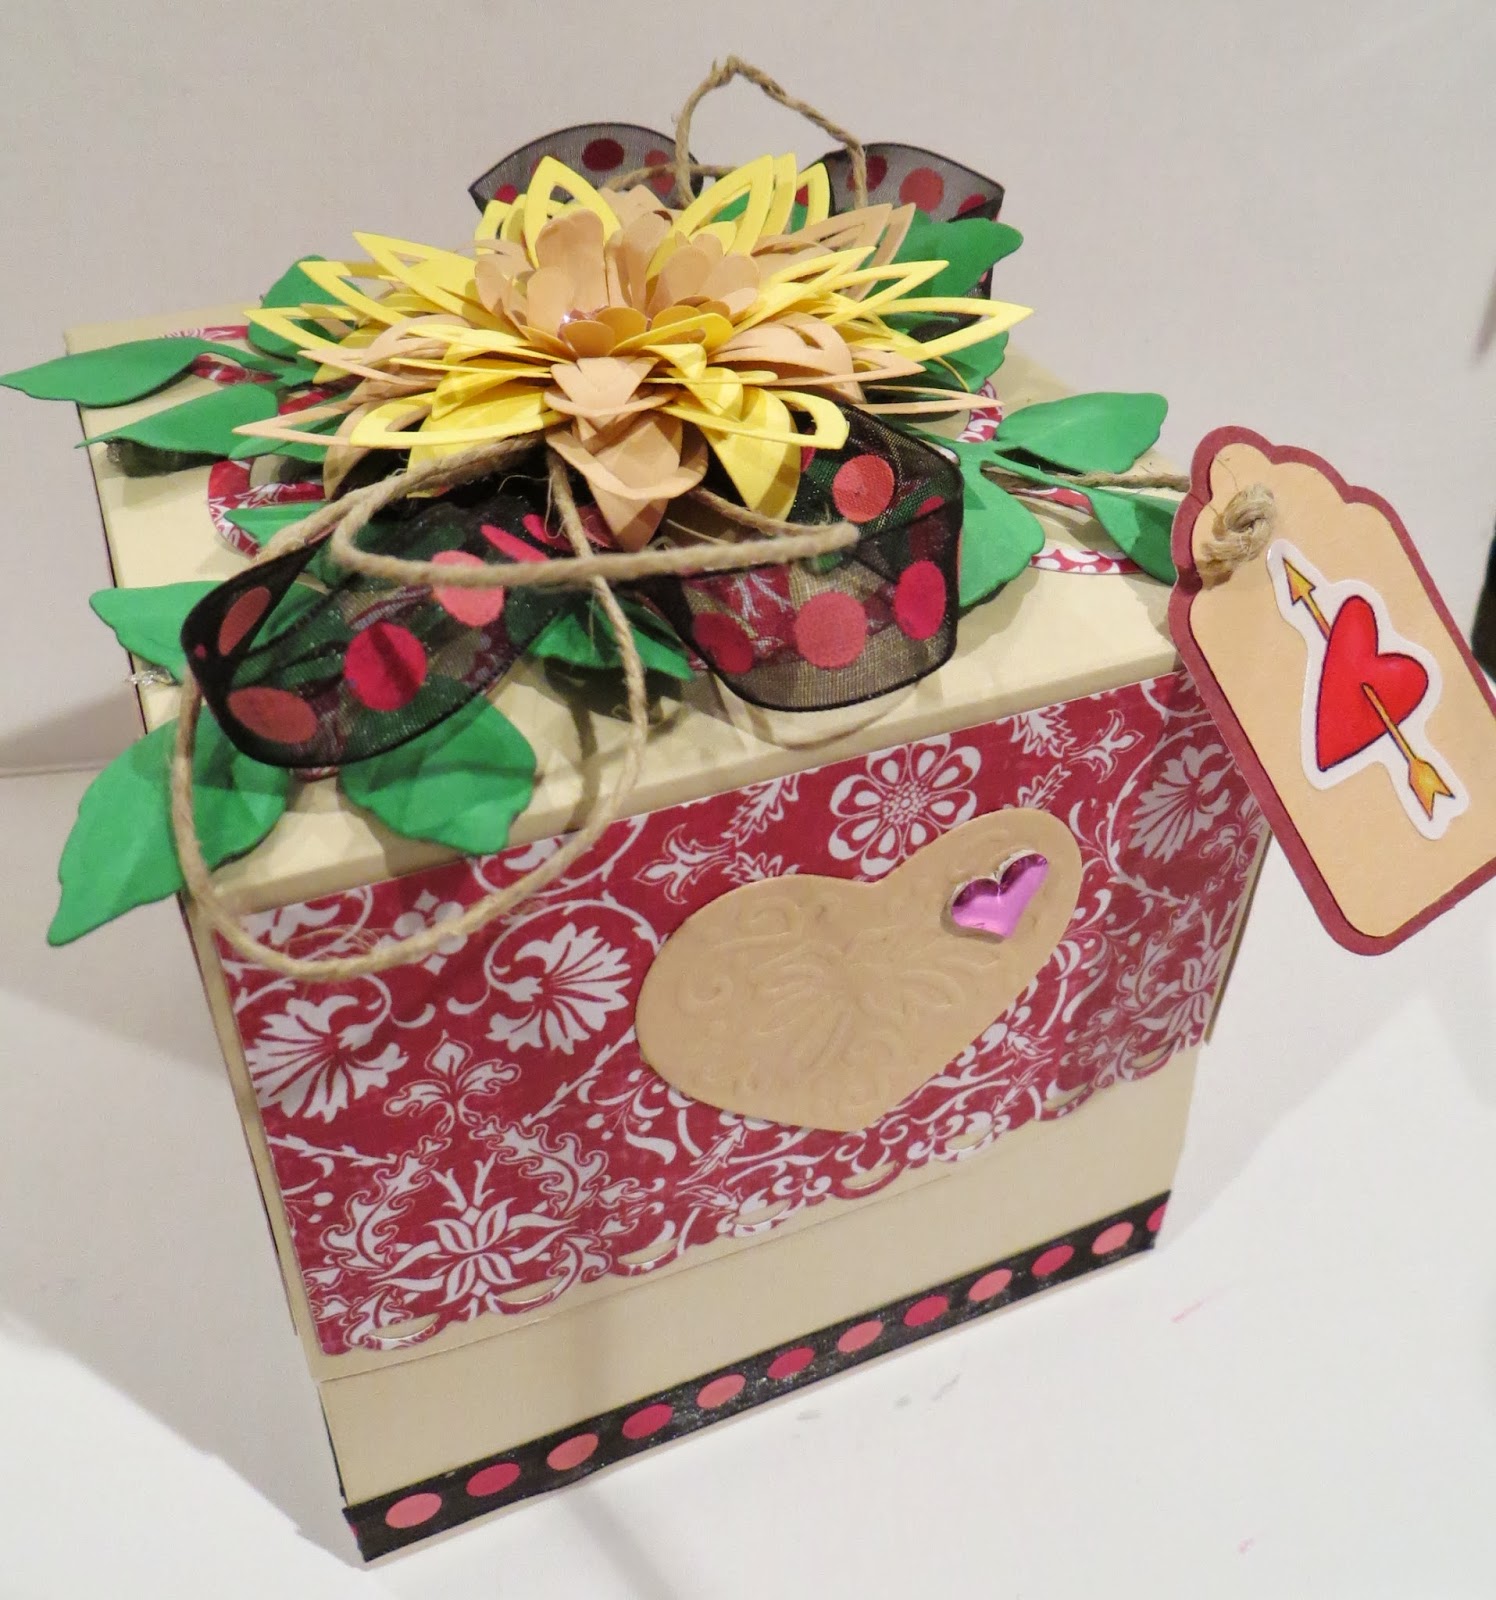
Here is the box closed with the lid on it.

Close-up of the top of the cover.  The flower and leaves are Nestabilites (

The cover pulls up and two sides drop down.

Side view

Close-up of all the details on Minnie and Mickey which were done with decoupage method.  I absolutely love using Decoupage 3D glue from http://www.crafterscompanion.com/.  The best on the market!

 Nestability die-cut window shows a beautiful day with lots of flowers in bloom. I used torn towel paper, sponge and Memento ink to create the sky.  The Inkadinkado Meadow Stamp set flowers were inked with Memento Markers.  


 The heart was white embossed, colored and cut out from the middle of an Outline stamp.  If you look close, you can see a piece of acetate holding the heart up.  It is free floating and moves as the box top is removed. 


Friday, February 15, 2013

Valentines Cards 2013

These first two cards are for our Grandchildren.  Both cards both free digitals that I downloaded.   The first one is from Mo's Digital Pencil.  I love this one!  Perfect for the grandchildren who are a little bit older.  I used my printer for the inside verse "Right from the start...You stole our hearts!!  Happy Valentines Day!!!"


This next image was perfect for the younger Grandchildren.  It was a free digital image from
  Bugaboo Stamps
The inside states "Happy Valentine's Day to Ewe".  Both the image and verse is a set.


This card has a free digital image from Sassy Studio Designs and for my husband.  I do not make him very many cards....I know...I am bad!  I make them for so many others, I decided he needed a special one from me.


Now that Valentines is done...can you believe I already have Christmas cards on the brain?

*lol*
thanks for stopping!
Netta

Wednesday, February 15, 2012

Happy "Late" Valentines!

This will be a quick post.  I have been so busy with tax season for the past two weeks I have not even been in my craft room hardly!  I did manage to make a couple of cards to mail to my grandchildren.  Wanted to post them yesterday but I came down sick =(...so here they are!!  The images came from coloring book digital images online.  


Ok...back to sorting paperwork!! ugh..

Manetta

Tuesday, January 31, 2012

Valentine Jasmine


Valentine Jasmine...perfect Valentine card for my granddaughter who LOVES the Disney princesses.  
I got this image from a coloring page online.  I used my new Touch Markers to color the image.

The inside of the card has lots of sparkles!


Manetta

Monday, January 30, 2012

Jan 13th Stamping Up Class

Two weeks ago, Jan 13th,  I went to a local Stamping Up Class held by Lisa (Gulf Coast Stampers and Scrappers).  I had not been in a loooong time.  It was good to see old crafting friends again!

Here are the cards we made that night!


I waited to stamp this flower card until I got home.  I wanted it to be a card I could use for a thank you type card.

thanks for stopping by!
Manetta