Saturday, January 26, 2019

52 CCT January Technique Challenge


Time for another Challenge at 52 CCT!  This time it is all about heat embossing!  


I like this challenge as I sort of got away from heat embossing lately.
Right in the middle of my project, my embossing gun died.  I had to run down to the craft store at 8 pm just to buy a new one. I knew I was on borrowed time anyway as it was over 20 years old!  I got a Paper Studio heat gun.  I was shocked as the price of the new one was what I paid for mine long ago. This one is a little more slimline & lighter in weight which makes holding & using it easier.  It heats up faster as well.  On this project, because I was embossing white on white, I took my time and stamped only a couple of snowflakes at a time.  By the time I got done, I was surprised the tool was quite warm and it even had a lot of rest as I worked the snowflakes slowly.  Hope it gives me another 20 yrs like my first one.

After the embossing was done and cooled, I rubbed 3 different colors of Distress Oxide on the card, making sure they over lapped in color.  I used Peacock Feathers, Mustard Seed and Tumbled glass. Embossing does not hold the color so it is easy to wipe off the snowflakes to make them stand out against the color.  The snowflakes came from BoBunny stamps set called Snowflakes Stamp.  Sentiment was a dollar store purchase years ago.  I first had it done in white to match the card but the words just did not show up well enough so I ripped it off. I re-stamped with Versafine Onyx Black.  Versafine sometimes will stay wet long enough so you can emboss.  I used clear embossing powder on it and heat emboss the words as well.

Thank you for stopping by.  I hope you play along with the 52 Christmas Card Throwdown team!  Show us what you got!  *S*

Netta

Saturday, January 19, 2019

52 CCT January Theme Challenge

I have been playing with a die set this week and it is one I have had for at least a year.  Sad to say, I have never used this set and it is so pretty too. There are two 1st with this card I made. Not only is the die being used for the first time but it is also the first time I have done an A9 card!  Wow it is big.  Although, it folds flat into an envelope, it will probably be one of those cards I will hand out to someone.  
Going to have to make an envelope it will fit in once it is folded!
 I love the color of dark blue and silver together. The card takes on a more serene atmosphere look and perfect for the theme Silent Night at 52 Christmas Card Throwdown.  


Can't go wrong with this die set which is a Sizzix Thinlit Die set called "Holiday Shadow Box".


Thank you for stopping by!
Manetta

Saturday, January 12, 2019

52 CCT January Color Challenge


Happy Saturday everyone.  It's time for another 52 Christmas Card Throwdown challenge!  


When I saw the challenge colors, I knew right away what I wanted to do.  I love these poinsettia's from Tim Holtz.  I used it once in red but this time I wanted to use the odd color of purple and see how it would look.  I was pleasantly surprised at how well the two purples on the flower matched with the 2 greens I used for foliage.  

Curious at what you will do?  Join in and share what Christmas card you created using purple and green as the primary color.

Netta


Saturday, January 5, 2019

52 CCT January Sketch Challenge

Happy New Year Everyone!
The 52 Christmas Card Throwndown team's challenge today is to create a card with a sketch......so here's a card to celebrate the beginning of 2019!


I used air brushing and a piece of scrap paper torn to get my background on my card first.  I only used 3 copic colors...B91 B95 B99.  I am still getting use to using the air brushing technique but practice makes perfect right?

I flipped the sketch over on my card.  The edging, deer and Santa was stamped with Memento Danube Blue.  The stars were a dollar store punch I found years ago.  Some of the dots were colored over with sparkling gelly roll pen.
Be sure to check out the other designers' blogs for inspiration and give the challenge a go using the following sketch!  We would love to have you join us.


Netta

Sunday, December 30, 2018

Christmas Up Up and Away

I work in an office and I have the BEST boss.  We all love him.  At Christmas we want to get him the #1 gift but every year it is hard to figure out what to get him.  Every once in a while someone comes up with an awesome idea.  This year, I think, was one of those times.  In October 2019, he is planning to go to the big Balloon  Festival in New Mexico so one of my co-workers came up with the idea to get him a gift card to pay for his flight!

The paper I used on this card is from Reminisce Snowflake Ridge paper set.  Oh my gosh...I have to tell you that paper is Gorgeous!   I remember the day when I use to hoard paper/cardstock but I asked myself why?  So... not anymore.   The dies I used on the front is the Sizzix Tim Holtz Merry Moose die set. Isn't it the cutest!  I just had to have it and was worth waiting 3 weeks while it was on backorder.  I made one extra page to the card and placed it before the balloon page so everyone had enough room to write a message to our boss.

I wanted to make a card that would go along with the balloon festival that we all could sign.  I had his emoji he created on his phone and I printed it out to put him in the balloon.  I also found a black and white line image of a balloon.  Once I had that, I was off and running with no real idea of what to do.  Created as I went. You can see in the third photo, the balloon popped up when you opened the card.  I will admit, the cardstock cracked where it bent for the popup but I fixed it by gluing a white piece of cardstock on the inside where no one could see it to make it more stable.  It worked perfectly.

So without further ado.....


Wednesday, December 5, 2018

Christmas Ornaments on a Card


I have a small 4.5 x 6.5 paper pad that is several years old.  Are you like me and get tired of looking at the same paper year after year? 
 I was trying to come up with a way to use some of the papers.  Using just ornament dies, I cut the paper out and popped it up on a card.  The extra small ornament I had cut decorated the inside.  For the strings, I cut thin strips of sparkled black cardstock.  I also used the black Spica pen on the ornaments to follow some of the lines on the ornaments to give it a bit of sparkle.  You can't see it on the photo...trust me...it's there!

I am just about done making all my Christmas cards but I will keep going.  Since I have the Christmas spirit, I might as well keep going.  You never know when you need an extra card!

Enjoy your crafting day!
Netta

Tuesday, December 4, 2018

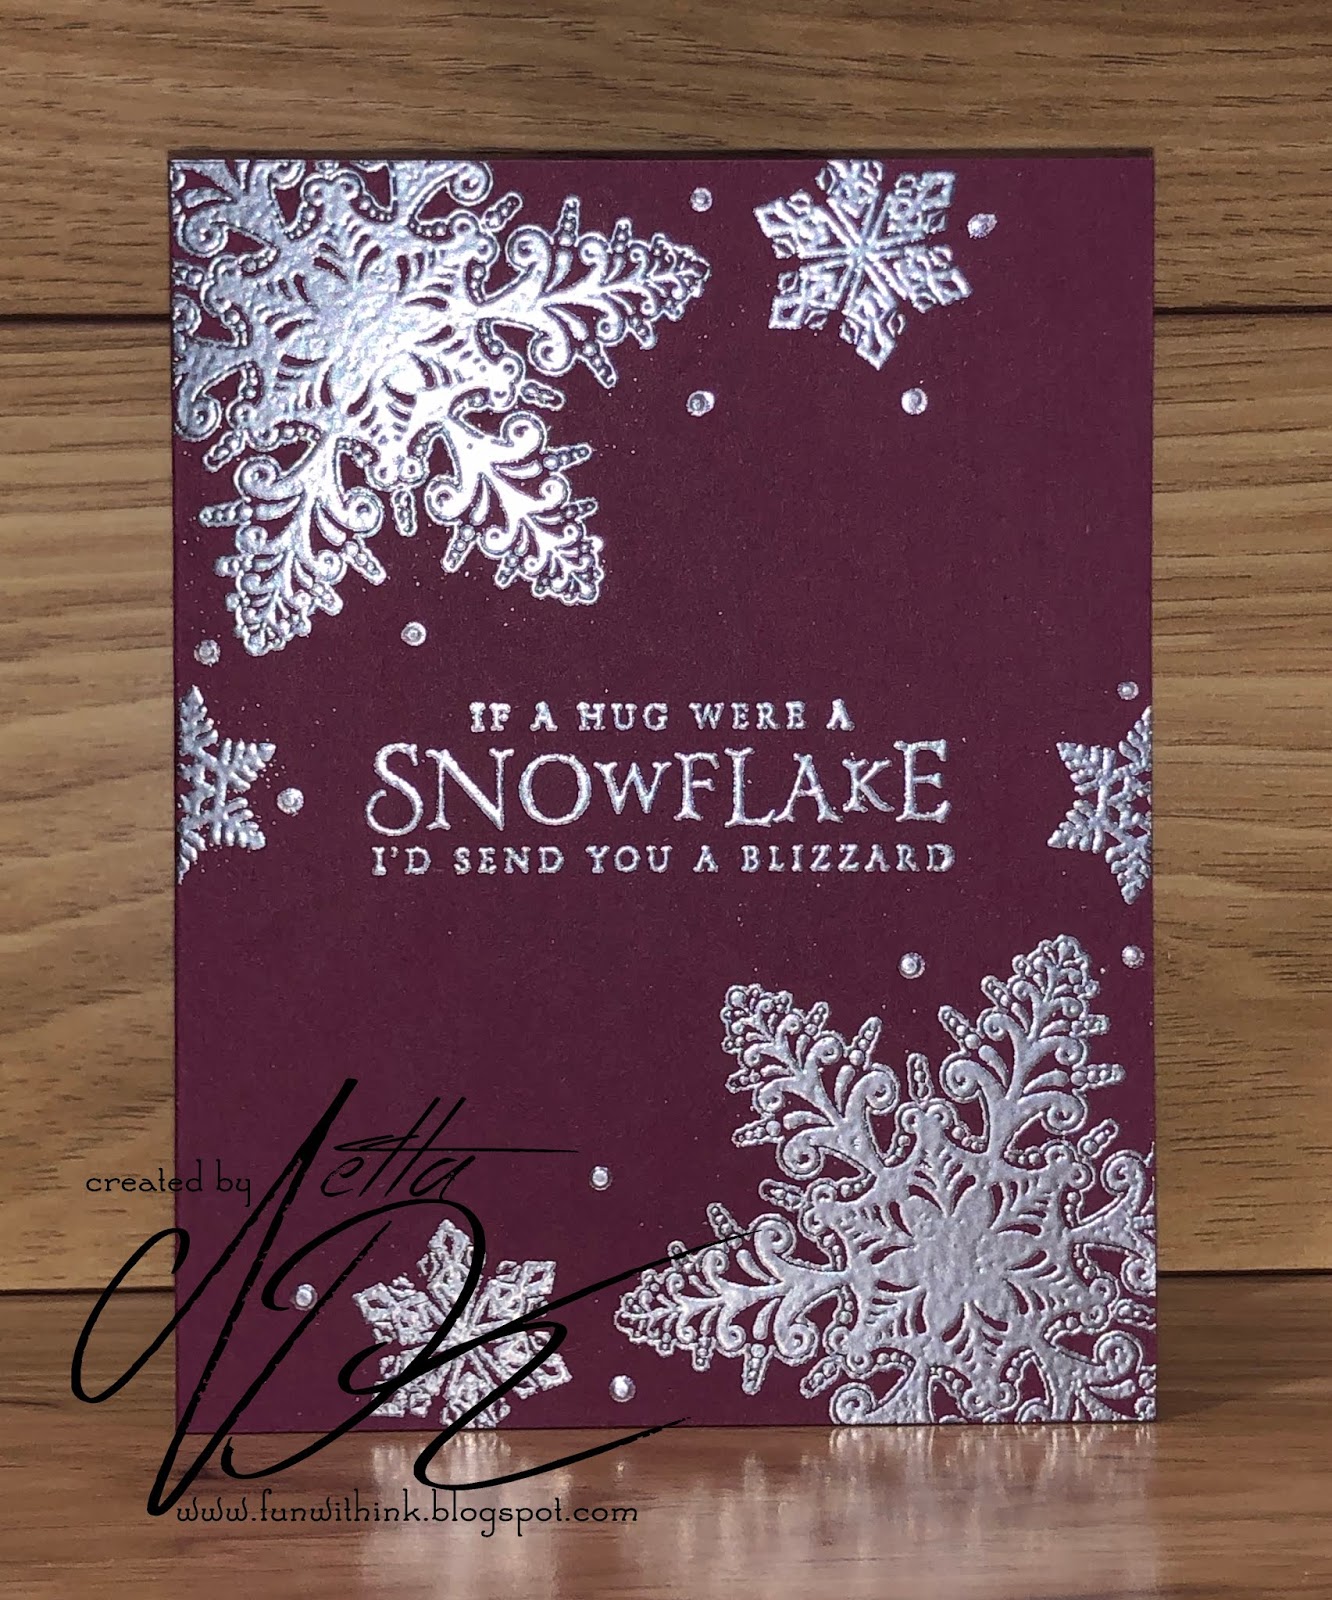
It's Snowing!


Well.....not really.  This is about as close to snow as I will get in Florida.  I loved the Christmas snow before I moved here.  I have many fond memories and maybe some not so great ones too lol.
My husband asked me why I put wintery things on my Christmas cards one day.  Seriously?  Who wants to make a Christmas card with a beach scene!  Not I!

Anyway....this card was quick and simple.  The stamp set is a BoBunny Snowflakes stamp set.  It comes with 11 different shapes and sizes as we all know all snowflakes are different!  Just a versamark pad, embossing powder and a heat gun is all you need for this one.
The sentiment came from Stampin Up Beautiful Blizzard stamp set and the Nuvo Crystal Drops were added to finish off the card.

Thank you for stopping by!
Netta

Monday, December 3, 2018

Have Yourself a Very Merry Fairy Christmas


Is she just the cutest!  She is from Whimsy Stamps called "Holly".  I had so much fun coloring her up with my copics.  

How are you all doing with your cards?  
Netta

52 CCT November Stash Challenge-Ribbon & Glitter


Just a quick post today to show my piece for the 52 CCT Ribbon & Glitter challenge.  


This is a die from Tim Holtz collection and it has amazing detail!  I alternated a deep red metallic and cardstock for the petals.  Along each petal is a lot of glitter glue.  Ribbon was a small piece I found in my red drawer.   It matched the metallic red color and has a edge of gold.

Now that it is December .....(where did November go!)....I get to announce the great news!  I was chosen as one of the new Design Team Members for 52 Christmas Card Throwdown!  I am looking forward to and very excited to be working with the team in 2019.  

Hope all of you are busy crafting....for me....I am off to work!
Enjoy

Netta

Sunday, December 2, 2018

Happy Hanukkah!


Whew!  Got my Hanukkah cards done just in the nick of time.
Happy Hanukkah to all who celebrate!


This is my 2nd post today.  I wanted to get this out since it is the season.
I used an older set from Close to my Heart called Jewish Remembrance for the background.  The dreidels were stamped and heat embossed with Silver Tinsel embossing powder.  The Dreidel Song along the edge was printed in Word.  I finished it off with drops of Nuvo Crystal Drops "Simply White".

Now to quickly get them ready for the mail.

Netta

52 CCT November Theme Challenge-Snow Globe

Hello and welcome!  
I just returned from being away on vacation and a brief time of being ill.  Today, I am feeling more myself so playing catch up on a couple of challenges and my blog.

First up was the 52 Christmas Card Throwdown November theme challenge- SnowGlobes.  I actually had the card done before I left and ran out of time to share it.  This card was all done with dies.  I wish I could tell you where I got the snowglobe free die but I don't remember which magazine it came in a year or so ago.


If you are trying to get your cards done & run out of ideas, head on over to http://52cct.blogspot.com and get some inspiration!

Netta


Monday, November 12, 2018

Christmas Minc Bears

I decided to try my hand at using the Heidi Swapp Minc Machine and foil. 
 A little bit of coloring red and sparkle on the hat makes for a simple quick but cute Christmas card. 


So quick....I actually made two.


Have you tried foiling? If not, the idea is just to use heat and pressure of the Minc Machine or laminator that presses the foil against the image printed with toner.  A regular printer would not work because the image is printed with an ink jet.  If you have all the equipment/tools and have not tried, you should!  You might be pleasantly surprised.

Netta


Sunday, November 11, 2018

Winter and Polar Bear


This was a quick card to make.  Scrap Papers took care of this card...white cardstock and a blueish background with white dots.  I am considering them as snow and to top it off, I added one little cluster of snowflakes stamped in white.  A circle punch took care of moon and trees cut from Tim Holtz Set Merry Christmas.

Stamped the Recollections Polar Bear onto a scrap of white and even though a die came with the set, I cut it out with scissors. I was not sure if this was still available to buy, but I did find it at Amazon so you can see what it looks like. Copics colors BG11 and BG13 to lightly color the bear and scarf.  I hand cut the snowy hills and popped each layer from the one behind to give it a 3D look.  The hills also have the edge colored with BG11.

Thank you for stopping by.  Now...go get your scrap box out and use them up!

Netta

Saturday, November 10, 2018

52 CCT November Challenge-Colors

I am so excited!  I was asked to be a guest designer for this weeks challenge at 52 Christmas Card Throwdown and I have never been a guest designer before.  What an exciting time for me!

This weeks challenge was to use colors.  The colors are not something I typically use so I had to really figure this one out.  This is what I came up with.  


This image was a digital image from Becky's Place but not sure if it is still there as I got it long ago.  I printed it out and colored it...trying to match the colors in the challenge as much as possible.  The trees look dark however I thought it matched very well to the green in the challenge.

I could not believe the colors I used in the snowman!  A lot!  
Copics: #BG10, BG11, BG13, B63, R20, R22, R30, E43, YR04,YR09, C00, C3 and Colorless Blender.  
The hills were hand cut with a touch of B0000 on the edge.  After I glued them all in place...stickles along the edge of the hills and all the way around the whole card for a border topped it all off.  My sister says "It is not a Christmas card without sparkles".   Maybe she has something there!
  The snow background was a folder that I wiped with Memento Summer Sky before I embossed so the flakes have a hint of soft blue.  

I can't believe how many cards I have done so far.  I think I am very close to my goal.  
How many more do you need to do?
Netta

Thursday, November 8, 2018

52 CCT Challenge-November Sketch

What is a sketch?  
A sketch is just a great way to get an idea when you are making a card.  They even have them for scrapbooks layouts too.  I have even taken a scrapbook sketch and made a card out of it and vice versa.  You can flip them...turn them sideways...upside down...whatever you want!  If you are stuck, they are a great way to get you unstuck and the ideas flowing.

Here is my version of this months sketch at 52 CCT November challenge


Here is the original sketch

and here is what I used...I flipped it completely.


If you are ever stuck...do a google search card sketch.  Trust me....you will be glad you did!  Soon you will be off and running with ideas.

Thank you for stopping by,
Netta

Birthday-Whoopie

Co-worker had a birthday recently and I made her card.  At the office, when someone has a birthday, we celebrate with cards and whatever dessert they choose.  You also get to wear a crown during this celebration and a photo is taken.  
Humiliating? Naaaaaaaa.  We laugh and have fun.
When I saw this image at Mo's Digital Pencil, I just had to have it!  It was perfect! 


I put it inside to surprise her.  Her expression was priceless!
This was on the front.


I make cards to bring a smile or chuckle to someone's face...even if it is for just a fleeting moment.  I did my job on this one!
Netta


Tuesday, November 6, 2018

Junk Box Example

A few days ago I mentioned my junk-box.  All mistakes go into it for possible future use.  I wanted to show you how useful that junk box was....once again.


The background on this card was in that  junk-box and it was too pretty to leave in there.  When I had cut it out, the border was off and too skinny on one side.  I figured I might be able to cut a die out it or something so I saved it.  I decided I could use it and make another sympathy card by cutting an extra border for the edge to hide the mistake.  I glued the background down so it was centered on the card.  I glued the border down over the top of the background and now you can't see it was a mistake!  Border is now even all the way around and I have an extra sympathy card for my stash.

Keep your mistakes.  Some day you might find a treasure inside.
Have a great crafting day!
Netta

Monday, November 5, 2018

Season Has Begun

I wish I was referring to Christmas Season but I am not.  It is the season for banging out those Holiday cards but sadly it is also the season for Sympathy as well. 

If you have followed my blog for at least a year, you have heard me talk about it.  For those of you who are new....for the past 15+ years I make and donate all the sympathy cards to a local nursing home throughout the year.   Thanksgiving through New Years is always the worse.  There has been some years where I had to switch off...one Christmas...one Sympathy.  Last year was not as busy, which was good for the nursing home.  Not many passed away thank goodness!
This season started early.

I was asked to make 3.  I better make a stack and be ready.

Here is what I made.


I recently picked up a die from Diesire called "Classic Floral Frame".  My first one did not cut out all the pieces so for the rest I shimmed with a piece of copy paper and it worked excellent.  It may be time to switch out my plates on my Big Shot.  The sentiment outside came from Stampin Up set "Walk in the Wild".  The bow, which I LOVE, is an Impression Obsession bow.  I topped it off with Stickles "True Blue" on some of the flower centers.


Thank you for stopping by!
Netta

Saturday, November 3, 2018

Bugaboo Reindeer

I had printed and colored up two of the digital reindeer image from Bugaboo (see 1st card here Crazy Reindeer), so I decided to go ahead and make the second one into a card.  I fussy cut it out and glued it on after creating my background.


 For my birthday I had received the Copic Air brushing system. I played around with spraying some different colors to get some practice and saved them in my junk box.  My junk box is a container where I throw samples/practices/cards with mistakes/etc into.  Sometimes I will dig into it because there might be something I can cut up or use on a card.   The background on this card was one of those practice pieces.  

I am slowly getting to my goal for Christmas Cards this year.  I might actually be done early!  yaaaaaa
Happy Crafting....
Netta

Sunday, October 28, 2018

52 CCT October Challenge-Masking Take 2

52 Christmas Card Throwndown new challenge is about masking.  I already did one card.  To read about it and what is masking... click here 52 CCT October Challenge-Masking technique.  I did have this card posted on that same page but I was not able to upload it to the challenge so I opened up another page for this card.

  On this card, I masked the penguins to protect them when I stamped the big tree.  I also masked the snowman's butt area to stamp my little tree.   This card has one more fun technique called paper piecing on it. I stamped the jacket, hats and scarfs on other paper. Cut them out and glued them in place.  

Going to go add this one to the challenge as well.  Happy Crafting!!


Netta