Monday, January 4, 2016

Splitcoaststampers Card Sketch's 1, 2 and 3

I started working Splitcoaststampers sketches.  You can find the entire list on Splitcoaststampers card sketches page.  I got the 1st three done.  Not sure how far I will get but when I need some motivation, I can always turn to the sketches!  

The 1st two were done and mailed off at Christmas Time but I didn't get around to sharing them.  The 3rd sketch I did today...a birthday card for my stash.


#1 Sketch


#2 Sketch


#3 Sketch


Hope you have a crafty day!  Thanks for stopping by and checking out my creations.  

Netta

Sunday, January 3, 2016

The East Wind-Flag on the Play

Over at The East Wind blog, there is a challenge to use a banner, fishtail flag, bunting or a pennant shape on your creation.  I am using the image we received in the January 2016 newsletter.  If you want the freebie image...head over to The East Wind and sign up for their newsletter!

This is my card I am submitting to their challenge.


I printed the image out twice.  Once on just copy paper and the second on Georgia Pacific white cardstock.  I colored the image using markers on the cardstock.  The second image was to cut out and used as a mask on the image to protect it while I sponged on ink around it.    The ink I sponged on was Stampin Up ink colors Pumpkin Pie, So Saffron, Tempting Turquoise, Pacific Point, Not Quite Navy and Whisper White.  
Let it Snow banner was a die cut and stamp set from Marianne Design.  My creation was finished off with Star Dust Stickles to get snow to sparkle. 

My sister and I...to keep motivated all year to get Christmas cards done..started our own weekly challenge for the next 50 weeks.  This week was Anything Goes.   

Thank you for stopping by!
Netta

Saturday, January 2, 2016

Outlawz Progressive Challenge

Happy New Year!!!

Today I made my 1st card for 2016.  It does not have anything inside.  Keeping it as a "just in case I need something quick" card.  


I decided to join the Outlawz Progressive Challenge.   Every month you get a free image emailed to you and due by the last day of the month.   This month the beautiful Cabbage Roses image came from Sandi Huggett at Sandi's Samples.  
I used Derwent Inktense Pencils to color the image and highlight the edge.  After I was all done, I colored over it with Twinkling H2O's Gold and the background was colored with Twinkling H2O's Sage.  The Spellbinders butterfly adorned the card front and the background was cut using Top Dog Die Modern Mosaic.  The twine was something I had for years and was happy I had the right matching colors.  

Here is a close-ups of the shimmering image and background.


I am also going to submit this to the Scrabooks-r-us group challenge # 85 Very Girly Creations.

Thank you for stopping by!
Netta

Thursday, December 31, 2015

2015 Christmas Cards To Share

Just because I have not posted much doesn't mean I have not been making Christmas cards.  I have been busy!  
Here are some of the cards I made for Christmas 2015.  Just click on each card to open them up larger if you want a closer look!

Enjoy
Netta


Magical Christmas Window Card

Every year, my co-workers get a Christmas card from me along with some type of snack.  
The cards I make are normally time consuming and special for them.  This year the card fold is called a Free Standing Pop Up card but my cards had a door that opened.  You can see how to make a regular Free Standing Pop Up card here.  I just modified the dimensions a bit to make my idea work.  


The card I decided to make has 23 pieces and I made 13 cards in all.  It took me a bit to figure all the measurements right and after 3 attempts, I got it!.  The card was slightly bigger than an A2 size card when closed... 5 1/2 x 4 3/4.  I wanted the base of the card to be slightly larger to accommodate the doors once opened.   Lucky I had some envelopes that were perfect for this size and didn't have to make my own.  The width with the doors closed was 3 1/4.  To get the door sections perfectly, I first cut the blue section 5 1/2 by 6 3/4.  The extra 1/4 width allowed room for the fold and closing of the doors over the bulk of everything under it. After scoring where the door closing folds were, I trimmed the doors pieces off 1" up from the bottom so once the door section pulled up from the base, it could open.   

Here are some more views of the card so you can see the side views and how it fits into the envelope.


The Merry Christmas section, once completely opened, was on the bottom of the card. To close the card, the card base just slid up past the doors until it was flat.

Here is the back of the card where I wrote to the recipient. 


Made 13 in all and a couple were mailed out before I remembered to take a picture.


I hope this inspires you to go out of the norm and create a special card for that special someone!

Enjoy and have a great crafting day!!

Netta


Thursday, December 3, 2015

Vellum Christmas Tree

A few weeks ago I had a few women over to craft.  They had asked me to show them how I made my Christmas tree pop up using vellum and a stylus tool.

I set up my craft room onto the lanai so there was enough room for us.  With Christmas music playing in the background we all created this card, with me walking them through step by step.  
We had a lot of fun!  
Here is the basic card we created.  I loved seeing everyone's versions of my card.


Hope this inspires you to give this vellum and stylus technique a try!.  
Have a great crafting day.


Tuesday, December 1, 2015

Cozy Warm & Bright

It is now Dec 1st and my favorite season has begun!  At work we started playing Christmas songs and the decorations are going up.  All year I have been making Christmas cards but the crunch time is upon us!  

Every year I vow to completely  finish a card-front, back and middle.  Every year I start out well and every year I fail.  The day I am trying to get them labeled and in the mail...I am also busy trying to stamp the inside.  Not a good situation at all.  Very stressful.  But....I am happy to say that this year it was and has been different!  I actually have each card completed!  It's a good feeling.   My labels are done too.  Just sign my name, make a personal note, peel sticker for addresses and done.  

The card was created by mostly dies.  For the Memory Box Glowing Candle die I had to cut it 3 times for each card (green glitter paper, gold glitter paper and cranberry). 
 The Spellbinders Layered Poinsettia 2 smallest dies was cut from glitter gold paper and cranberry.  
The cranberry background was cut using one of the dies from Spellbinders Radiant Rectangles.
Merry Christmas came from Stampin Up Good Greetings set.
Martha Stewart pine bunch was the last touch.


I do not normally make more than 2 or 3 cards the same but I made 20 of this card only because they were made for someone else.  Out of all the cards I have made, this one is my favorite.  I will have to make myself one as well.  It took me about an hour a piece to make from beginning to end.  The glitter paper I used did not cooperate and would not cut well.  If anyone knows where I can get glitter paper that is not so difficult to use, please leave me a message.  

 Last night putting the last of the pieces together and I broke my favorite evergreen punch.  Guess I will have to go shopping!  *S* 

Netta

Monday, November 30, 2015

It's That Time Again..Sympathy

Christmas is such a happy time!  I love making all my Christmas cards and I have been busy!
But along with the Holiday cards. I have to make many sympathy cards as well.  For those who might be new to my blog, I make all the sympathy cards for a local nursing home.  They send out cards to family members when their loved one has passed.  Inside the card, they write a personal note about the one who passed.  During the holidays the passing of loved ones climbs higher than any other time of year.  There have been some years where I have to match card for card (sympathy and Christmas).  Thank goodness the past 2 years it has been on the quiet side.

The sympathy cards are usually mass production.  I give them a batch and they let me know when they are low. 


Now back to Christmas Cards!

Netta

Monday, October 12, 2015

The Fisherman's Birthday

I love October.  It is one of my favorite months and there is a lot going on during the month.  There are plenty of cards to make for Birthdays, Anniversaries and then there is Halloween.

One of the Birthdays is my grandson.  This past summer he spent a lot of time fishing with dad and doing a pretty darn good job at it..catching some amazing fish!  I had already discussed the birthday gift with him prior and we decided on money was the best thing.  That way he could go buy the new fishing tackle that he wants.  I thought it would be appropriate to make him a fishing vest so I searched online for the best way to cut the card.  I came across this site here..  Stamp Away With Me that had a free pattern.  I had to doctor it up a bit to fit with what I wanted on the A2 size card but her pattern was a huge help to get me started.


Before I put anything together, I used a dauber bottle with walnut ink to darken the edges of all the pieces and used a thin black marker for the stitching.  For the two top pockets, I popped them up with pop dots.  One was to hold the money so I had to make sure the pop dots were just used along the very edge.  After putting the card together, I used a sea sponge to sponge on walnut antique ink and old olive ink on the card to get the "dirty" fishing look.  

Long ago, when I pulled the silver cover off of a container, I thought that it would be a perfect for "something" as it was embossed with tiny squares.  No idea what the something was going to be until yesterday!  It was perfect for hand cutting out the lures and coloring with a colored marker.  For the hooks I just used craft wire that I twisted and bent to look like hooks.  Everything was glued down onto and into the 2nd top pocket.  
Here is a close up of the lures and hooks I made.


To get the t-shirt look inside, I used the card itself as the pattern on white cardstock.  It isn't perfect as I had to  trim it by hand to make it smaller than the card.  I used my computer to print the words out on copy paper.  With removable glue along the very edge of the t-shirt cardstock and using the paper against a window to see where I wanted the print to print on the t-shirt, I glued down the t-shirt cardstock.  I placed the copy paper back into the printer with the t-shirt cardstock stuck to it and reprinted the wording again.  


With the money already stuffed, the card is ready 
to go in the mail to him.  
Thank you for stopping by.  I hope you have a great crafting day!
Netta

Sunday, October 11, 2015

We ARE the Walking Dead Family

To all you Walking Dead Fans....Tonight is the night!
Premier of Season 6!!

My youngest son got me hooked on The Walking Dead about 3 years ago.  For those who do not know, it is an American horror drama television series and tonight begins its sixth year.  Many of us are very excited.  There are two more in my family who are hooked.  Two years ago my Aunt V and my sister Faye came to visit me for about 4 weeks.  I had to watch my show each week..not missing an episode while they did nothing, but make grunts noise and faces...making fun of my show.  *insert rolling of eyes from me* lol

Fast forward to about 3 weeks into their visit.  I came home one day from work to find the two of them huddled in the craft room with all the lights off. Both faces up very close to an ipad. They were staring at the ipad so much, they never heard me come into the room.  I found out they had been spending their time during the day...not outdoors in the nice sun, but inside trying to get all caught up from Season 1 to the current show!!  

So you can imagine the excitement that has been happening with tonight's show coming so when Mo's Digital Pencil came out with the Zombies digital stamp, I just had to have it.  It's perfect for now and perfect for Halloween.  I whipped up 3 cards and mailed them out...One for my son, one for my sister and one for my aunt.   They loved getting them.


Inside it says
They are coming..............
The Walking Dead

I had one more image that I turned into a Halloween Card.  This one I put white around the Walking Dead to give them a glow.  


If you like the Walking Dead...give me a shout!

Enjoy your crafting day!
Netta


Friday, September 25, 2015

School Playground Fundraiser

Did you know there was only 90 days to Christmas?  That means..if you are a cardmaker...you have even LESS time to get those cards done and in the mail!   In the midst of making my 100+ cards...I stopped to make additional holiday cards for another reason.

Back home in NH a small school is trying to raise money to buy a new playground.  I donated 2 sets to them.   I forgot to take photos before I shipped them off to my daughter-in-law for the Saturday 9/26/15 event.  She kindly took photos for me!

The first set of 8 had 5 Christmas Cards and 3 Thanksgiving Cards along with 8 envelopes.  The 8 cards was placed into the purse I made.   I got the directions online however I lost the link.  I did another search and found one very similar at UStamp4Fun.  She has a great tutorial with a pdf download.  I love her site and visit it a lot.  The leaves were cut from Poinsettia Die set.  Before I popped the leaves out, I used Cottage Ivy Memento Ink to get the darker green vein on the leaves.  


Each A2 card inside the bag is in a protective plastic envelope to protect them if anyone pulled them out to look at.  


The 2nd set of A2 cards was a set of 8 cards and 8 envelopes.  All the cards in the box were the same card so I decorated the box top with what the cards looked like inside.  The box was closed and tied with a green ribbon to protect the cards inside.


I hope the cards help them out!  

Now back to my own cards...

Netta  

Friday, September 4, 2015

Happy Birthday Flutter By Hop

Happy Birthday Danni!!

Hello Everyone and welcome!
To celebrate Danni's birthday today and to have fun remembering the Flutter by Wednesday Challenge that Danni use to run, a Blog Hop has been created.

We encourage you to flutter from blog to blog leaving comments for Danni and wishing her a Happy Birthday.   Danni will be offering 2 separate Gift Certificates and the two winners will be chosen from those who leave comments.  You have until Monday September 7th to leave her a comment.  On Tuesday, September 8th, she will announce the winner on her blog!

The hop list is:


Now on to my contribution to the Flutter by Blog Hop!
Our creation had to have either a Butterfly or a Fairy.  I went with a Fairy Christmas card!

I started out with sponging first with Stampin Up Soft Sky ink and then I used Stampin Up Pacific Point.  The branches came from a set of stamps from Sheena Douglass A Little Bit Scenic called Silhouette Highlands.  The Fairy is called Mini Lark from Susana's Custom Art and Card Design.  The words are a set I had for years and over time, I lost where they came from.  Crystal and Candy Cane Stickles created the sparkle on the Fairy and berries on the tree!  It was not a complicated card but to me...it is a very peaceful card!


Thank you for stopping by.
Don't forget to wish Danni a Happy Birthday!!

Netta


Tuesday, August 11, 2015

Spotlight Sunset

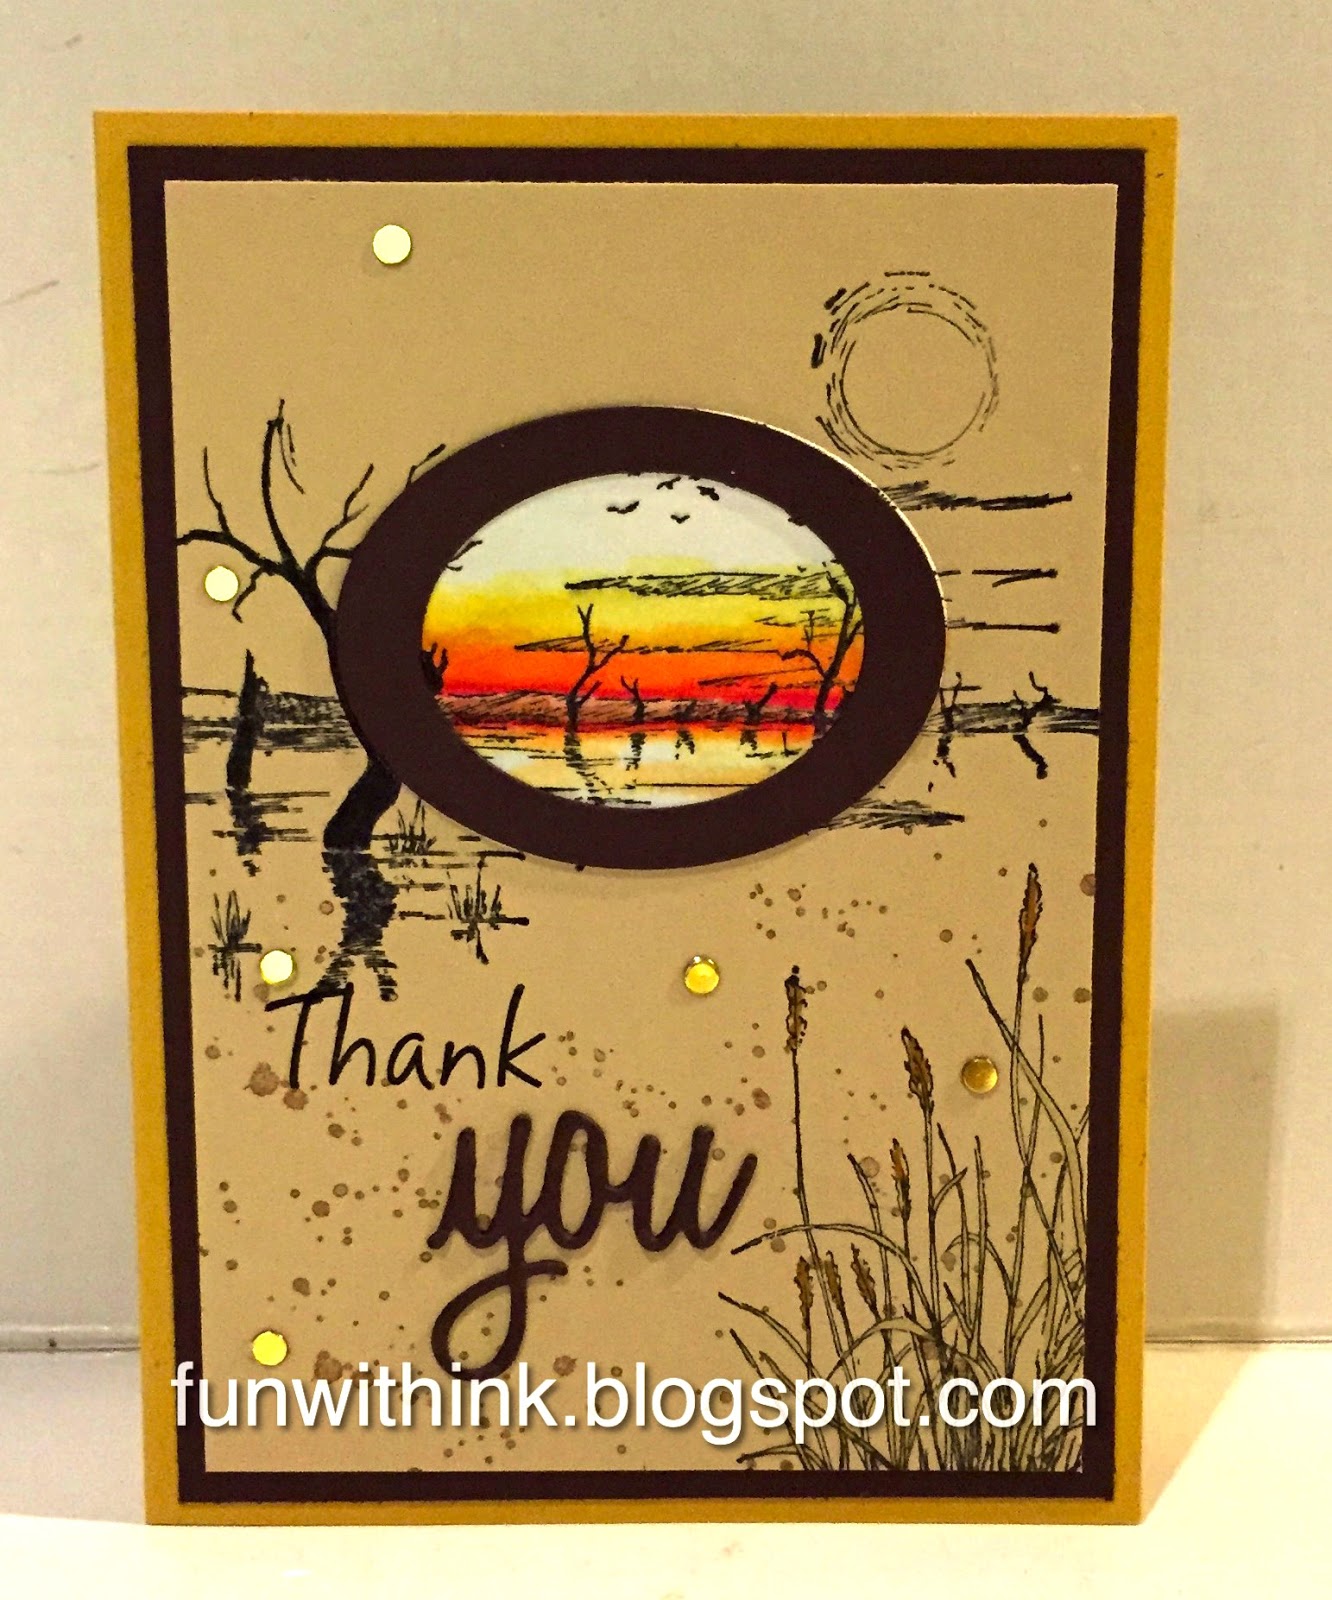
Many of you probably remember the technique called Spotlighting.  It is a great card technique when time is short and you need a special card.   It is also a perfect way to color an image where the details are too tiny on the image.

One way is to stamp the image on your cardstock.  Cut out a frame and place it down on top of your image, coloring only inside the frame.  It's fun if you place the frame at different angles.  Make sure you glue the frame down first before you color!

The other way is to stamp the image twice.  Once on the card itself and the other image is on a white cardstock.  You can use a nestability to cut out what part you want to color on the image.  You color the piece you cut out and glue it down on top of the image or pop it up with pop dots.  Now cut a frame out of coordinating cardstock and glue that down over the section you colored.  This is the way that I did my cards except I did not pop them up.

These make great masculine cards!  
Enjoy....
Netta


Saturday, July 4, 2015

Happy Birthday on 4th of July

Happy 4th of July to all!!
I had a great day at the beach and a wonderful meal with friends today.  Hope you all had a safe and wonderful day with your family and friends as well.

Today is a quick post to show you a card I made for a friend who has her birthday on 4th of July.  Theme of course is red white and blue.  When you open the card, poppers and stars bounce around.


thank you for stopping by
Netta

Tuesday, June 30, 2015

It's A One Flap Of a Card

I had fun making todays card for a co-worker.  She gave me a stamp set from Stampingbella and it is called Wiz.   She was showing me some stamps she bought and Wiz was one of them.  I mentioned how I adored him.  When she got her order in, she gave him to me as a gift.  I wanted to thank her by using Wiz.


I found a fold I wanted to try called One Flap Fold.  I had to design my own dimensions to fit the Wiz but it was easy enough to do to make this fit an A2 size envelope.  After stamping him with Memento Tuxedo Black, I painted him with Twinkling H20's to give his entire image a shimmer.  It is hard to take a picture of the real shimmer.  At first I left the background white but it was too bright.  I used Shimmerz which is another shimmery paint to make a swirling background like dusk setting.  The crystal ball has crystal effects to give it that glassy look.  
*side note: did you know if your Shimmerz dried up you can just use small amount of distilled water and your paint is good as new?*

The bottom background was fun to do.  I wanted the look of stars because to me Wiz reminds me of having a cosmic energy.  I took a larger piece of black cardstock and lightly sprayed bleach on it.  The black turned like a purplish grey color where the bleach removed the color. 

I used a Q-tip to rub blue, pink and yellow chalk into the bleached areas to form planets.  I also swirled some color across the black cardstock to make comets etc.  The last part was made from a toothbrush and watered down white paint.  To make the splatters like stars, dip the toothbrush bristles in the paint and using your finger fan it across the bristles over the paper and it will spray little tiny globs.  Good idea to protect your area and to wear disposable gloves unless you don't mind fingers full of paint!  After it was dry, I sprayed it lightly with hairspray so that the chalk would not rub off and cut it down to size.  

I cut three sets of Sizzix thinlits words and glued them on top of each other to make the words thicker.  Top layer of the words was cut from a heavy shimmery cardstock. I wanted to raise the thank you up high enough to give the image a place to rest against to keep it in the up position.  The image lifts up and lays flat for mailing. 


I hope she enjoys it.   Thank you for stopping by! 

Netta

Monday, June 29, 2015

Your Getting Old When

Where I work, we love to poke fun when it is someone's birthday.  No one takes it seriously.  One of the reasons we all get along so well is we do make work fun when we can.  One of my co-workers had a birthday and I was heading off on vacation.  She said to me "Don't forget my card!". lol  They love seeing what I will come up with.

The card I made is a 6 x 6.  Not my usual A2 size so I had to even make the envelope to go with it which is fine.  That means I get to play with my Envelope Punch Board.

The Fancy Fold on this card is called a Peek-A-Boo.  When the card is closed, you see one image through the peek-a-boo hole.


When you open the card you see another image slide into view!


You can put two images to view but I chose to put my Happy Birthday in that spot.  

Hope she likes yellow!

Thank you for stopping by...
Netta


Wednesday, June 3, 2015

Wishing You a Wonderful Day

Another simple card from the Stampin Up class last Sunday that I just finished up this morning.  Also I added a little sparkle to the cupcake as well.  What is a birthday card without a little something added!   It's simple and I love it.  Especially the colors.


Have a wonderful crafty day!
Netta

Monday, June 1, 2015

SBRUS Challenge # 45-Hello!

This is going to be a quick post.  Yesterday I went to a Gulfcoast Stampers & Scrappers get together to see the new Caddy that will be released tomorrow.  

All I can say is WOW...I need to be working overtime to pay for all I want/need LOL

Meanwhile...we made this card in class.  I like the idea of diecutting words.  May have to add them to my list of "must have".


Have a great day!
Netta